2009 Volvo Xc60 Owner's Manual
Table of Contents
2009 Volvo Xc60 Overview
Introduction
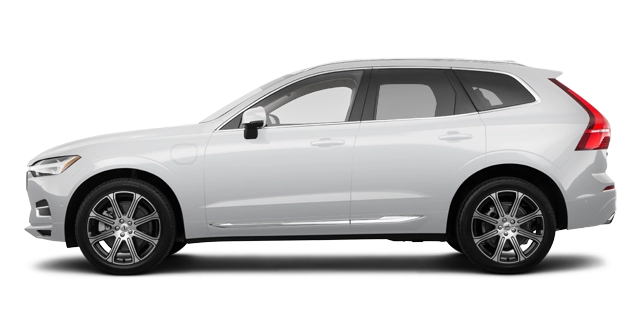
The 2009 Volvo XC60 marks a significant entry into the compact luxury SUV market, combining the brand's renowned safety features with a stylish and modern design. With a sleek exterior and a spacious, comfortable interior, the XC60 caters to families and adventure seekers alike. The vehicle showcases Volvo's commitment to innovation and sustainability while providing an enjoyable driving experience, making it a noteworthy choice for consumers looking for both elegance and practicality.
Powertrains
The 2009 XC60 offers two robust powertrain options. The standard engine is a 3.2-liter inline-six producing 240 horsepower, paired with a six-speed automatic transmission. For those seeking enhanced performance, a more powerful 2.5-liter turbocharged five-cylinder engine provides 227 horsepower, bolstered by an all-wheel-drive system that ensures excellent traction regardless of road conditions. Both engines deliver a smooth and responsive ride, perfectly blending power with efficiency.
Trims
The XC60 is available in three distinct trims: the 3.2, the 3.2 AWD, and the sporty T6 AWD. The base 3.2 trim comes well-equipped with numerous comfort and technology features, while the 3.2 AWD provides enhanced stability and control. The T6 AWD prioritizes sporty performance and adds additional luxury features, appealing to those who crave both thrill and comfort. Each trim level reflects Volvo's dedication to quality and user-friendly design.
Features
This luxury SUV is packed with features that enhance both comfort and safety. Standard amenities include leather upholstery, power-adjustable front seats, a premium sound system, and the notable Volvo S60's well-reputed safety technology. Optional features consist of a navigation system, rear parking sensors, and a panoramic sunroof. The XC60 aims to offer a seamless blend of luxury, practicality, and advanced safety options for discerning drivers.
Owners Manual
The 2009 Volvo XC60 comes with a comprehensive owner's manual that provides essential information on vehicle operation, maintenance schedules, and safety features. It serves as a valuable resource for owners, ensuring that they can maximize the vehicle's performance and longevity while remaining informed about potential recalls or service bulletins. This user-friendly manual empowers drivers to enjoy their XC60 with confidence and peace of mind.
User manual download
The Volvo Xc60 owner manual for the 2009 model year is to be found in PDF downloadable format on this page. The owner manual for the model year 2009 is free and in English, but the repair manuals are usually not easy to get and may cost more.

Manual Questions
Fill the form below and someone will help you!