2008 Lexus Is250 Owner's Manual
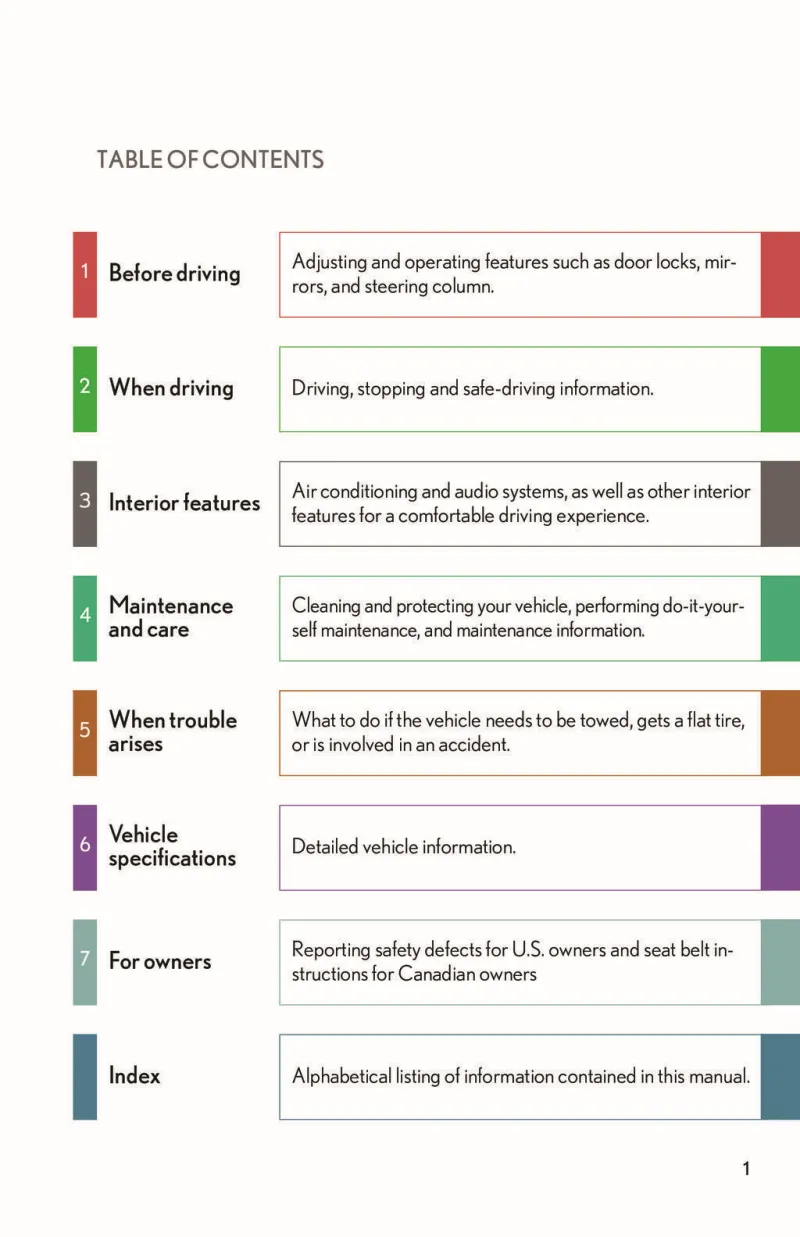
2008 Lexus Is250 owners manual
Year:
2008
Make:
Lexus
Model:
Is250
Rating:
(7)

Online manual

Size:
7.82 MB

Table of Contents

Front
1
TOC
2
Pictoral index
6
Foreword
16
Key information
19
Opening, closing and locking the doors and trunk
21
Adjustable components seats, mirrors, steering wheel
43
Opening and closing the windows and moon roof
63
Refueling
68
Theft deterrent system
71
Safety information
76
Driving procedures
107
Instrument cluster
130
Operating the lights and windshield wipers
143
Using other driving systems
152
Driving information
179
Using the air conditioning system and defogger
191
Using the audio system
200
Using the interior lights
230
Using the storage features
235
Other interior features
241
Maintenance and care
272
Maintenance
278
Do-it-yourself maintenance
284
Essential information
347
Steps to take in an emergency
357
Specifications
402
Customization
432
Initialization
437
Reporting safety defects for U.S. owners
439
Abbreviation list
442
Alphabetical index
444
What to do if
456
Gas station information
458
Scheduled Maintenace Guide
459
Exterior
1
P. 128
1
P. 146
1
P. 143
1
P. 143
1
P. 289
1
P. 143
1
P. 147
1
P. 66
1
P. 61
1
P. 306
2
P. 382
2
P. 415
2
P. 424
2
P. 143
2
P. 143
2
P. 41
2
P. 200
2
P. 37
2
P. 69
2
P. 128
2
Interior
3
P. 52
3
P. 79
3
P. 79
3
P. 79
3
P. 260
3
P. 241
3
P. 51
3
P. 44
3
P. 239
3
P. 79
3
P. 237
3
P. 250
3
P. 248
3
P. 239
3
P. 255
3
P. 237
3
P. 269
4
P. 264
4
P. 60
4
P. 234
4
P. 66
4
P. 234
4
P. 243
4
P. 234
4
P. 234
4
P. 242
4
P. 259
4
P. 79
4
P. 46
5
P. 49
5
P. 37
5
P. 61
5
P. 64
5
Interior
5
P. 251
6
P. 253
6
P. 122
6
P. 392
6
P. 249
6
P. 248
6
P. 126
6
P. 129
6
P. 249
6
P. 248
6
P. 251
6
Instrument panel
7
P. 143
7
P. 128
7
P. 146
7
P. 124
7
P. 130
7
P. 139
7
P. 147
7
P. 117
7
P. 41
7
P. 236
7
P. 58
7
P. 59
7
P. 129
7
P. 229
7
P. 244
8
P. 201
8
P. 192
8
P. 200
8
P. 72, 74
8
P. 244
8
P. 72, 74
8
Instrument panel
9
P. 152, 155
9
P. 155
9
P. 140
9
P. 140
9
P. 155
9
P. 152, 155
9
P. 172
9
P. 123
9
P. 172
9
P. 126
9
P. 41
10
P. 69
10
P. 151
10
P. 245
10
P. 131
10
P. 228
3
Please note that this manual applies to all models and explains all equipment, including options. Therefore, you may find some explanations for equipment not installed on your vehicle.
1
All specifications provided in this manual are current at the time of printing. However, because of the Lexus policy of continual product improvement, we reserve the right to make changes at any time without notice.
1
Depending on specifications, the vehicle shown in the illustration may differ from your vehicle in terms of color and equipment.
1
A wide variety of non-genuine spare parts and accessories for Lexus vehicles are currently available in the market. You should k...
1
This vehicle should not be modified with non-genuine Lexus products. Modification with non-genuine Lexus products could affect i...
1
As the installation of a mobile two-way radio system in your vehicle could affect electronic systems such as the multiport fuel ...
1
The SRS airbag and seat belt pretensioner devices in your Lexus contain explosive chemicals. If the vehicle is scrapped with the...
2
Driving under the influence: Never drive your vehicle when under the influence of alcohol or drugs that have impaired your abili...
2
Defensive driving: Always drive defensively. Anticipate mistakes that other drivers or pedestrians might make and be ready to avoid accidents.
2
Driver distraction: Always give your full attention to driving. Anything that distracts the driver, such as adjusting controls, ...
2
This is a warning against anything which may cause injury to people if the warning is ignored. You are informed about what you must or must not do in order to reduce the risk of injury to yourself and others.
3
n Key number plate
2
l Do not subject the keys to strong shocks, expose them to high temperatures by placing them in direct sunlight, or get them wet.
2
l Do not expose the keys to electromagnetic materials or attach any material that blocks electromagnetic waves to the key surface.
2
Locks and unlocks the doors (ÆP. 23)
1
Unlocks the trunk (ÆP. 23)
1
Starts the engine (ÆP. 117)
1
l When the electronic key battery is depleted
5
l Near a TV tower, electric power plant, gas station, radio station, large display, airport or other facility that generates strong radio waves or electrical noise
5
. Cards to which aluminum foil is attached
5
. Cigarette boxes that have aluminum foil inside
5
. Metallic wallets or bags
5
. Coins
5
. Hand warmers made of metal
5
. Media such as CDs and DVDs
5
l When multiple electronic keys are in the vicinity
5
. Another vehicle's electronic key or a wireless key that emits radio waves
5
. Personal computer or personal digital assistant (PDA)
5
. Digital audio player
5
. Portable game system
5
l If window tint with a metallic content or metallic objects are attached to the rear window
5
Turn the “ENGINE START STOP” switch OFF.
6
Unlock the doors using the electronic key and open one of the doors. If a door is not opened within 60 seconds after is pressed,...
6
l When the entry function has not been used for a month or more
7
l The vehicle is locked using the door handle lock switch.
7
l The vehicle is locked/unlocked using the wireless remote control function. (ÆP. 34)
7
. TVs
7
. Personal computers
7
. Cellular phones, cordless phones and battery chargers
7
. Recharging cellular phones or cordless phones
7
. Glass top ranges
7
. Table lamps
7
n To operate the system properly
7
. The electronic key is too close to the window or outside door handle, near the ground, or in a high place when the doors are locked or unlocked.
8
. The electronic key is near the ground or in a high place, or too close to the rear bumper center when the trunk is unlocked.
8
. The electronic key is on the instrument panel, rear package tray or floor, or in the glove box when the engine is started or “ENGINE START STOP” switch modes are changed.
8
l As long as the electronic key is within the effective range, the doors may be locked or unlocked by anyone.
8
l Even if the electronic key is not inside the vehicle, it may be possible to start the engine if the electronic key is near the window.
8
l The doors may unlock if a large amount of water splashes on the door handle, such as in the rain or in a car wash. (The doors will automatically be locked after approximately 60 seconds if the doors are not opened and closed.)
8
l Gripping the door handle when wearing a glove may not unlock the door.
8
l If the wireless remote control is used to lock the doors when the electronic key is near the vehicle, there is a possibility that the door may not be unlocked by the entry function. (Use the wireless remote control to unlock the doors.)
8
l A sudden approach to the effective range or door handle operation may prevent the doors from being unlocked. In this case, return the door handle to the original position and check that the doors unlock before pulling the door handle again.
8
n Alarms and warning indicators
9
l Locking and unlocking the doors and trunk: Use the mechanical key. (ÆP. 394)
10
l Starting the engine: ÆP. 117
10
n Certification for the smart access system with push-button start
10
For vehicles sold in the U.S.A.
10
l Reorient or relocate the receiving antenna.
11
l Increase the separation between the equipment and receiver.
11
l Connect the equipment into an outlet on a circuit different from that to which the receiver is connected.
11
l Consult the dealer or an experienced radio/TV technician for help.
11
FCC WARNING: Changes or modifications not expressly approved by the party responsible for compliance could void the user's authority to operate the equipment.
11
For vehicles sold in Canada
11
l People with implanted pacemakers or cardiac defibrillators should keep away from the smart access system antennas. (ÆP. 24) Th...
12
l User of any electrical medical device other than implanted pacemakers and implanted cardiac defibrillators should consult the ...
12
n Operation signals
13
Doors: A buzzer sounds and the emergency flashers flash to indicate that the doors have been locked/unlocked. (Locked: Once; Unlocked: Twice)
13
n Certification for wireless remote control
14
For vehicles sold in the U.S.A.
14
l Reorient or relocate the receiving antenna.
14
l Increase the separation between the equipment and receiver.
14
l Connect the equipment into an outlet on a circuit different from that to which the receiver is connected.
14
l Consult the dealer or an experienced radio/TV technician for help.
14
FCC WARNING: Changes or modifications not expressly approved by the party responsible for compliance could void the user's authority to operate the equipment.
14
For vehicles sold in Canada
15
NOTE: Operation is subject to the following two conditions: (1) this device may not cause interference, and (2) this device must accept any interference, including interference that may cause undesired operation of the device.
15
ÆP. 34
16
n Customization that can be configured at Lexus dealer
19
l Always use a seat belt.
19
l Always lock all doors.
19
l Ensure that all doors are properly closed.
19
l Do not pull the inside handle of the front door while driving.
19
l Set the rear door child protector locks when children are seated in the rear seat.
19
The trunk can be opened using the trunk opener, entry function or wireless remote control.
20
n Trunk light
21
When the trunk light switch is set to on, the trunk light turns on when the trunk is opened.
21
n Internal trunk release lever
21
n Using the mechanical key
21
Manual seat
1
Seat position lever
1
Seatback angle lever
1
Vertical height adjustment lever
1
Seat cushion (front) angle knob
1
Power seat
2
Seat position switch
2
Seatback angle switch
2
Seat cushion (front) angle switch
2
l Do not recline the seat more than necessary when the vehicle is in motion to reduce the risk of sliding under the lap belt. If...
2
l Manual seat only: After adjusting the seat, make sure that the seat is locked in position.
2
Switch to IGNITION ON mode.
3
Turn the “ENGINE START STOP” switch OFF and close the driver's door.
5
While pushing the “SET” button, pushon the wireless remote control until the signal beeps.
5
l Push the “SET” button.
5
l Push button “1”, “2” or “3”.
5
l Adjust the seat using the switches (only cancels seat position recall).
5
n If the battery is disconnected
5
Take care during seat adjustment that the seat does not strike the rear passenger or squeeze your body against the steering wheel.
5
Switch to IGNITION ON mode.
6
l Push the “SET” button.
7
l Push button “1”, “2” or “3”.
7
l Adjust the seat position using the switches.
7
n If the battery is disconnected
7
n Adjusting the rear seat head restraints
8
l Use the head restraints designed for each respective seat.
8
l Adjust the head restraints to the correct position at all times.
8
l Do not drive with the head restraints removed.
8
Make sure that all occupants are wearing their seat belts before driving the vehicle.
9
n Correct use of the seat belts
9
n Pregnant women
11
Obtain medical advice and wear the seat belt in the proper way. (ÆP. 52)
11
l Use a child restraint system appropriate for the child, until the child become large enough to properly wear the vehicle's seat belt. (ÆP. 95)
12
l When the child becomes large enough to properly wear the vehicle's seat belt, follow the instructions on P. 52 regarding seat belt usage.
12
n Seat belt extender
12
l Ensure that all passengers wear a seat belt.
13
l Always wear a seat belt properly.
13
l Each seat belt should be used by one person only. Do not use a seat belt for more than one person at once, including children.
13
l Lexus recommends that children be seated in the rear seat and always use a seat belt and/or an appropriate child restraint system.
13
l Do not recline the seat any more than necessary to achieve a proper seating position. The seat belt is most effective when the occupants are sitting up straight and well back in the seats.
13
l Do not wear the shoulder belt under your arm.
13
l Do not place anything, such as a cushion, on the front passenger’s seat. Doing so will disperse the passenger’s weight, which ...
13
l Do not damage the seat belts by allowing the belt, plate, or buckle to be jammed in the door.
14
l Inspect the seat belt system periodically. Check for cuts, fraying, and loose parts. Do not use a damaged seat belt until it is replaced. Damaged seat belts cannot protect an occupant from death or serious injury.
14
l Ensure that the belt and tab are locked and the belt is not twisted. If the seat belt does not function correctly, immediately contact your Lexus dealer.
14
l Replace the seat assembly, including the belts, if your vehicle has been involved in a serious accident, even if there's no obvious damage.
14
l Do not wear the seat belt extender if you can fasten the seat belt without the extender.
14
l Do not use the seat belt extender when installing a child restraint system because the belt will not securely hold the child restraint system, increasing the risk of death or injury in the event of a collision.
14
l After wiping dirt off the mirrors
19
l When the mirrors fog up
19
l After waxing your vehicle in an automatic car wash
19
l Do not adjust the mirrors while driving.
20
l Do not drive with the mirrors folded back.
20
l The power windows can be opened and closed using the mechanical key. (ÆP. 394)
1
l The power windows can be opened using the wireless remote control. (ÆP. 34)
1
Open the window halfway.
2
n Customization that can be configured at Lexus dealer
2
l Check to make sure that all passengers do not have any part of their body in a position where it could be caught when a window is being operated.
2
l Never try jamming any part of your body to activate the jam protection function intentionally.
2
l The jam protection function may not work if something gets caught just before the window fully closes.
2
Use the overhead switches to open, close, and tilt the moon roof up and down.
3
n Manually opening and closing
3
l The moon roof can be opened and closed using the mechanical key. (ÆP. 394)
4
l The moon roof can be opened using the wireless remote control. (ÆP. 34)
4
l Drive with the moon roof switch inwhen you open and close the moon roof manually.
4
l Drive with the moon roof where it has stopped when opening automatically.
4
n Customization that can be configured at Lexus dealer
4
l Do not allow any passengers to put their hands or heads outside the vehicle while it is moving.
5
l Check to make sure that all passengers do not have any part of their bodies in a position where they could be caught when the moon roof is being operated.
5
l Never try jamming any part of your body to activate the jam protection function intentionally.
5
l Touch the vehicle or some other metal surface to discharge any static electricity. Sparks resulting from discharging static electricity may cause the fuel vapors to ignite.
3
l Always hold the grips on the fuel tank cap and turn it slowly to remove it. A whooshing sound may be heard when the fuel tank ...
3
l Do not allow anyone that has not discharged static electricity from their bodies to come close to an open fuel tank.
3
l Do not inhale vaporized fuel. Fuel contains substances that are harmful if inhaled.
3
l Do not smoke while refueling the vehicle. Doing so may cause the fuel to ignite and cause a fire.
3
l If the grip portion of the key is in contact with a metallic object
1
l If the key is in close proximity to or touching a key to the security system (key with a built-in transponder chip) of another vehicle
1
n Certifications for the engine immobilizer system
1
For vehicles sold in the U.S.A.
1
FCC ID: NI4TMIMB-1
1
This device complies with Part 15 of the FCC Rules. Operation is subject to the following two conditions: (1) this device may no...
1
For vehicles sold in Canada
1
Do not modify, remove or disable the engine immobilizer system. If any unauthorized changes or modifications are made, the proper operation of the system cannot be guaranteed.
2
l A locked door or trunk is unlocked or opened in any way other than using the entry function, wireless remote door lock function or mechanical key with the alarm being set.
3
l The hood is opened with the alarm being set.
3
l Nobody is in the vehicle.
4
l The windows and moon roof are closed before the alarm is set.
4
l No valuables or other personal items are left in the vehicle.
4
n Panic mode
4
l A person inside the vehicle opens a door, the trunk or hood.
4
l The battery is recharged or replaced when the vehicle is locked.
4
n When the battery is disconnected
4
l Do not place a cushion between the driver or passenger and the seatback. A cushion may prevent correct posture from being achi...
2
l Take care when adjusting the seat position to ensure that other passengers are not injured by the moving seat.
2
SRS front airbags
3
SRS driver airbag/front passenger airbag Can help protect the head and chest of the driver and front passenger from impact with interior components.
3
Knee airbags Can help provide driver and front passenger protection.
3
SRS side and curtain shield airbags
3
SRS side airbags Can help protect the torso of the front seat occupants.
3
SRS curtain shield airbags Can help protect primarily the head of outside occupants.
3
Your vehicle is equipped with ADVANCED AIRBAGS designed based on US motor vehicle safety standards (FMVSS208). The airbag system...
4
l Bruising and slight abrasions may result from contact with a deploying (inflating) SRS airbag.
5
l A loud noise and white powder will be emitted.
5
l Parts of the airbag module (steering wheel hub, airbag cover and inflator) as well as the front seats, and parts of the front pillar, rear pillar and roof side rail, may be hot for several minutes. The airbag itself may also be hot.
5
l It is possible that in some collisions where the forward deceleration of the vehicle is very close to the designed threshold level, the SRS front airbags and the seat belt pretensioners may not activate together.
5
l The SRS side airbags and curtain shield airbags are designed to inflate when the passenger compartment is subjected to a severe impact from the side.
6
l The SRS side airbag on the passenger seat will not activate if there is no passenger sitting in the front passenger seat. However, the side airbag on the passenger seat may deploy if luggage is put in the seat, even if the seat is unoccupied. (ÆP. 90)
6
n Conditions under which the SRS airbags may deploy (inflate), other than a collision
6
The SRS front airbags may also deploy if a serious impact occurs to the underside of your vehicle. Some examples are shown in the illustration.
6
l Hitting a curb, edge of pavement or hard surface
6
n Types of collisions that may not deploy the SRS airbag (front airbags)
6
The SRS front airbags are generally not designed to inflate if the vehicle is involved in a side or rear collision, if it rolls ...
6
l Collision from the side
6
n Types of collisions that may not deploy the SRS airbag (side and curtain shield airbags)
7
The SRS side airbag and curtain shield airbag system may not activate if the vehicle is subjected to a collision from the side at certain angles, or a collision to the side of the vehicle body other than the passenger compartment.
7
l Collision from the side to the vehicle body other than the passenger compartment
7
l Collision from the side at an angle
7
The SRS side airbags and curtain shield airbags are not generally designed to inflate if the vehicle is involved in a frontal or rear collision, if it rolls over, or if it is involved in a low-speed side collision.
7
l Collision from the front
7
l Any of the SRS airbags have been inflated.
8
l The front of the vehicle is damaged or deformed, or was involved in an accident that was not severe enough to cause the SRS airbags to inflate.
8
l A portion of the doors is damaged or deformed, or the vehicle was involved in an accident that was not severe enough to cause the SRS side airbags and curtain shield airbags to inflate.
8
l The pad section of the steering wheel, front passenger airbag cover or lower portion of the instrument panel is scratched, cracked, or otherwise damaged.
8
l The surface of the seats with the side airbag is scratched, cracked, or otherwise damaged.
8
l The driver and all passengers in the vehicle must wear their seat belts properly. The SRS airbags are supplemental devices to be used with the seat belts.
9
. Move your seat to the rear as far as you can while still reaching the pedals comfortably.
9
. Slightly recline the back of the seat. Although vehicle designs vary, many drivers can achieve the 10 in. (250 mm) distance, e...
9
. If your steering wheel is adjustable, tilt it downward. This points the airbag toward your chest instead of your head and neck.
9
l The SRS front passenger airbag also deploys with considerable force, and can cause death or serious injury especially if the f...
10
l Do not sit on the edge of the seat or lean against the dashboard.
11
l Do not allow a child to stand in front of the SRS front passenger airbag unit or sit on the knees of a front passenger.
11
l Do not drive the vehicle while the driver or passenger have items resting on their knees.
11
l Do not lean against the door, the roof side rail or the front, side and rear pillars.
11
l Do not attach anything to or lean anything against areas such as the dashboard, steering wheel pad or lower portion of the instrument panel. These items can become projectiles when SRS driver, front passenger and knee airbags deploy.
12
l If the vinyl cover is put on the area where the SRS knee airbag will deploys, be sure to remove it.
12
l Do not use seat accessories which cover the parts where the SRS side airbags inflate as they may interfere with inflation of the airbags.
12
l Do not strike or apply significant levels of force to the area of the SRS airbag components shown on P. 80. Doing so can cause the SRS airbags to malfunction.
12
l Do not touch any of the component parts immediately after the SRS airbags have deployed (inflated) as they may be hot.
12
l If breathing becomes difficult after the SRS airbag has deployed, open a door or window to allow fresh air in, or leave the vehicle if it is safe to do so. Wash off any residue as soon as possible to prevent skin irritation.
12
l Installation, removal, disassembly and repair of the SRS airbags
13
l Repairs, modifications, removal or replacement of the steering wheel, instrument panel, dashboard, seats or seat upholstery, front, side and rear pillars or roof side rails
13
l Repairs or modifications of the front fender, front bumper, or side of the occupant compartment
13
l Installation of snow plows, winches, etc. to the front grille (bull bars, kangaroo bar etc.)
13
l Modifications to the vehicle's suspension system
13
l Installation of electronic devices such as mobile two-way radios or CD players
13
SRS warning light
14
“AIR BAG OFF” indicator light
14
“AIR BAG ON” indicator light
14
Front passenger’s seat belt reminder light
14
n Adult*1
15
n Child *3 or child restraint system*4
15
*1: The system judges a person of adult size as an adult. When a smaller adult sits in the front passenger seat, the system may recognize him/ her as a child depending on his/her physique and posture.
16
*2: In the event the front passenger does not wear a seat belt.
16
*3: When a larger child who has outgrown a child restraint system sits in the front passenger seat, the system may recognize him/her as an adult depending on his/her physique or posture.
16
l Wear the seat belt properly.
17
l Make sure the front passenger’s seat belt tab has not been left inserted into the buckle before someone sits in the front passenger seat.
17
l Make sure the “AIR BAG OFF” indicator light is not illuminated when using the seat belt extender for the front passenger seat....
17
l Do not put weight on the front passenger seat by putting your hands or feet on the front passenger seat seatback from the rear passenger seat.
17
l Do not let a rear passenger lift the front passenger seat with their feet or press on the seatback with their legs.
17
l Do not put objects under the front passenger seat.
17
l If an adult sits in the front passenger seat, the “AIR BAG ON” indicator light is illuminated. If the “AIR BAG OFF” indicator ...
18
l When it is unavoidable to install the forward-facing child restraint system on the front passenger seat, install the child restraint system on the front passenger seat in the proper order. (ÆP. 98)
18
l Do not modify or remove the front seats.
18
l Do not kick the front passenger seat or subject it to severe impact. Otherwise, the SRS warning light may come on to indicate a malfunction of the detection system. In this case, contact your Lexus dealer immediately.
18
l Child restraint systems installed on the rear seat should not contact the front seatbacks.
18
l Do not use a seat accessory, such as a cushion or seat cover, that covers the seat cushion surface.
18
l Do not modify or replace the upholstery of the front seat.
18
l Choose a child restraint system appropriate to the age and size of the child.
19
Infant seat
19
n Selecting an appropriate child restraint system
20
l Lexus strongly urges the use of a proper child restraint system that conforms to the size of the child, installed on the rear seat. According to accident statistics, the child is safer when properly restrained in the rear seat than in the front seat.
21
l Never install a rear-facing child restraint system on the front passenger seat. In the event of an accident, the force of the ...
21
l A forward-facing child restraint system should allowed to be installed on the front passenger seat only when it is unavoidable...
21
l Do not use the seat belt extender when installing a child restraint system on the front or rear passenger seat. If installing ...
21
l Do not allow the child to lean his/her head or any part of his/her body against the door or the area of the seat, front pillar...
21
l Keep the child restraint system properly secured on the seat even if it is not in use. Do not store the restraint unsecured in the passenger compartment.
21
l If it is necessary to detach the child restraint system, remove it from the vehicle or store it securely in the trunk. This will prevent it from injuring passengers in the event of a sudden stop or accident.
21
Follow the child restraint system manufacturer's instructions. Firmly secure child restraints to the rear seats using a seat belt or a child restraint lower anchorage. Attach the top strap when installing a child restraint.
22
n Rear facing æ Infant seat/convertible seat
23
n Laws and regulations pertaining to anchorages
28
l ALR mode causes the belt to tighten only which could cause injury or discomfort to the child.
28
Follow the directions given in the child restraint system installation manual and fix the child restraint system securely in pla...
29
l When a booster seat is installed, always ensure that the shoulder belt is positioned across the center of the child's shoulder...
29
l Ensure that the belt and tab are securely locked and the seat belt is not twisted.
29
l Push and pull the child seat in different directions to be sure it is secure.
29
The following procedures should be observed to ensure safe driving.
1
With the brake pedal depressed, shift the shift lever to D. (ÆP. 122)
1
Release the parking brake. (ÆP. 129)
1
With the clutch pedal fully depressed, shift the shift lever into 1. (ÆP. 126)
1
Release the parking brake. (ÆP. 129)
1
With the shift lever in D, push the brake pedal.
2
Set the parking brake. (ÆP. 129)
2
Shift the shift lever to P. (ÆP. 122)
2
Press the “ENGINE START STOP” switch and stop the engine.
2
With the clutch pedal fully depressed, push the brake pedal.
2
Set the parking brake. (ÆP. 129)
2
Shift the shift lever into N. (ÆP. 126)
2
Press the “ENGINE START STOP” switch to stop the engine.
2
Firmly set the parking brake and shift the shift lever to D.
2
Gently depress the accelerator pedal.
2
With the parking brake firmly set and the clutch pedal fully depressed, shift the shift lever into 1.
2
l Drive carefully when it is raining, because visibility will be reduced, the windows may become fogged-up, and the road will be slippery.
3
l Drive carefully when it starts to rain, because the road surface will be especially slippery.
3
l Refrain from high speeds when driving on an expressway in the rain, because there may be a layer of water between the tires and the road surface, preventing the steering and brakes from operating properly.
3
. Do not drive at extremely high speeds.
3
. Avoid sudden acceleration.
3
. Do not drive continuously in the low gears.
3
. Do not drive at a constant speed for extended periods.
3
n Normal characteristics after turning off the engine
3
. Accidentally depressing the accelerator pedal instead of the brake pedal will result in sudden acceleration that may lead to an accident that could result in death or serious injury.
4
. When backing up, you may twist your body around, leading to a difficulty in operating the pedals. Make sure to operate the pedals properly.
4
. Make sure to keep a correct driving posture even when moving the vehicle only slightly, allowing you to depress the brake and accelerator pedals properly.
4
. Depress the brake pedal using your right foot. Depressing the brake pedal using your left foot may delay response in an emergency, resulting in an accident.
4
l Do not drive the vehicle over or stop the vehicle near flammable materials.
4
l With automatic transmission vehicles, do not let the vehicle roll backwards while the shift lever is in a driving position, or...
4
l If the smell of exhaust is noticed inside the vehicle, open the windows and check that the trunk is closed. Large amounts of e...
4
l Do not under any circumstances shift the shift lever to P, R or N (automatic transmission vehicles) or R (manual transmission ...
4
l Do not shift the shift lever to N while the vehicle is moving. Doing so may cause the engine brake to not operate properly and lead to an accident.
4
l Do not turn the engine off while driving. The power steering and brake booster system will not operate properly if the engine is not running.
5
l Use engine braking (downshift) to maintain a safe speed when driving down a steep hill. Using the brakes continuously may cause the brakes to overheat and lose effectiveness. (ÆP. 123)
5
l When stopped on an inclined surface, use the brake pedal and parking brake to prevent the vehicle from rolling backward or forward and causing an accident.
5
l Do not adjust the position of the steering wheel, the seat, or the inside or outside rear view mirrors while driving. Doing so may result in a loss of vehicle control that can cause accidents that may result in death or serious injury.
5
l Always check that all passengers' arms, heads or other parts of their bodies are not outside the vehicle, as this may result in death or serious injury.
5
l Do not drive the vehicle off-road. This is not a AWD vehicle designed for real off-road driving. Proceed with all due caution if it becomes unavoidable to drive off-road.
5
l Do not drive across river crossings or through other bodies of water. This may cause electric/electronic components to short circuit, damage the engine or cause other serious damage to the vehicle.
5
l Sudden braking, acceleration and steering may cause tire slippage and reduce your ability to control the vehicle, resulting in an accident.
5
l Sudden changes in engine speed, such as engine braking caused by up-shifting or down-shifting, may cause the vehicle to skid, resulting in an accident.
5
l Do not race the engine. If the vehicle is in any gear other than P (vehicles with an automatic transmission only) or N the vehicle may accelerate suddenly and unexpectedly, and may cause an accident.
6
l Do not leave the vehicle with the engine running for a long time. If such a situation cannot be avoided, park the vehicle in an open space and check that exhaust fumes do not enter the vehicle interior.
6
. Gas may leak from a cigarette lighter or spray can, and may lead to a fire.
6
. The temperature inside the vehicle may cause the plastic lenses and plastic material of eye glasses to deform or crack.
6
. Soft drink cans may fracture, causing the contents to spray over the interior of the vehicle, and may also cause a short circuit in the vehicle's electrical components.
6
l Always apply the parking brake, shift the shift lever to P (vehicles with an automatic transmission only), stop the engine and lock the vehicle. Do not leave the vehicle unattended while the engine is running.
6
l Do not touch the exhaust pipe while the engine is running or immediately after turning the engine off. Doing so may cause burns.
6
l If the vehicle is in a poorly ventilated area, stop the engine. In a closed area, such as a garage, exhaust gases may collect and enter the vehicle. This may lead to death or a serious health hazard.
7
l When the brakes are wet, drive more cautiously. Braking distance increases when the brakes are wet, and may cause one side of the vehicle to brake differently than the other side. Also the parking brake may not securely hold the vehicle.
7
l If the power brake assist function does not operate, do not follow other vehicles closely and avoid downhills or sharp turns t...
7
l Do not pump the brake pedal if the engine stalls. Each push on the brake pedal uses up the reserve for the power-assisted brakes.
7
l With manual transmission vehicles, do not rest your foot on the clutch pedal while driving. Doing so may cause clutch trouble.
8
l With manual transmission vehicles, do not use any gears other than the first gear when starting off and moving forward. Doing so may damage the clutch.
8
l With automatic transmission vehicles, do not use the accelerator pedal or depress accelerator and brake pedals together to hold the vehicle on a hill.
8
l Do not turn the steering wheel fully in either direction and hold it there for a long time. Doing so may damage the power steering motor.
8
Have your Lexus dealer check and replace the brake pads as soon as possible. The rotor damage can result if the pads are not replaced when needed.
9
l It may be difficult to control your vehicle.
9
l The vehicle will make abnormal sounds.
9
l The vehicle will behave abnormally.
9
l Engine stalling
9
l Short in electrical components
9
l Brake function
9
l Changes in quantity and quality of oil and fluid used for the engine, transmission, differential, etc.
9
l Lubricant condition for the propeller shaft, bearings and suspension joints (where possible) and the function of all joints, bearings, etc.
9
Check that the parking brake is set.
10
Check that the parking brake is set.
11
n Note for the entry function
13
l Do not race a cold engine.
14
l If the engine becomes difficult to start or stalls frequently, have the engine checked immediately.
14
Select a shift position appropriate for the driving conditions.
15
*1: To improve fuel consumption and reduce noises, set the shift lever in the D position for normal driving.
16
The following patterns can be selected to suit current driving and operating conditions.
16
Shift the shift lever to the S position and operate the shift lever or shift paddle switch.
17
A lower shift range will provide greater engine braking forces than a higher shift range.
17
n AI-SHIFT
18
The AI-SHIFT automatically shifts the gear to the optimal position according to the driver performance and driving conditions. T...
18
n Maximum downshifting speed
20
n If the indicators flash faster than usual
21
Check that a light bulb in the front or rear turn signal lights has not burned out.
21
Displays the engine coolant temperature.
1
Odometer and trip meter
2
Odometer: Displays the total distance the vehicle has been driven.
2
Switches between odometer and trip meter displays. Pushing and holding the button will reset the trip meter when the trip meter is being displayed.
2
The brightness of the instrument panel lights can be adjusted.
2
The satellite switch can be used to change the set speed at which the yellow speed or tacho indicator ring comes on.
4
The setting can be made only when the “ENGINE START STOP” switch is in IGNITION ON mode and the vehicle is stopped.
4
Pushing and holding the switch changes values at a faster rate.
5
n Tacho indicator display conditions and engine speed setting range
5
l Do not let the indicator needle of the tachometer enter the red zone, which indicates the maximum engine speed.
6
The units used on the speedometer and the tachometer gauge display may differ depending on the model/type.
7
*
8
*
8
*
8
*
9
*
9
*
9
*
9
*
9
*
9
*
9
*
9
*
9
*
9
Without navigation system
11
With navigation system
11
. This distance is computed based on your average fuel consumption. As a result, the actual distance that can be driven may differ from that displayed.
12
. When only a small amount of fuel is added to the tank, the display may not be updated.
12
n Average fuel consumption
12
n Average fuel consumption after refueling
12
n Current fuel consumption
12
n System check display
13
turns on when the AFS is deactivated.
2
l When the headlights comes on: The headlights and tail lights turn off 30 seconds after a door is opened and closed if the “ENG...
3
n Customization that can be configured at Lexus dealer
3
Do not leave the lights on longer than necessary when the engine is not running.
3
l Intermittent wiper interval (“INT” mode)
6
n Customization that can be configured at Lexus dealer
7
n The headlight cleaner can be operated when
9
Use the cruise control to maintain a set speed without using the accelerator.
1
n Set the vehicle speed
1
l The shift lever is in the D or 4, 5 or 6 range of S. (vehicles with an automatic transmission)
2
l Vehicle speed is between approximately 25 mph (40 km/h) and 125 mph (200 km/h).
2
l Actual vehicle speed falls more than 10 mph (16 km/h) below the preset vehicle speed At this time, the memorized set speed is not retained.
2
l Actual vehicle speed is below 25 mph (40km/h)
2
l VSC is activated
2
n If the cruise control indicator light flashes
3
l In heavy traffic
3
l On roads with sharp bends
3
l On slippery roads, such as those covered with rain, ice or snow
3
l On steep hills
3
l On winding roads
3
Dynamic radar cruise control supplements conventional cruise control with a vehicle-to-vehicle distance control. In the vehicle-...
4
n Select cruise mode
4
n Driving in the selected cruise control mode
5
n Adjusting the speed setting
5
When the vehicle ahead of you executes a lane change, the system slowly accelerates until the set vehicle speed is reached. The system then returns to fixed speed cruising.
8
l The shift lever is in D or the 4, 5 or 6 range of S.
8
l Vehicle speed is between approximately 30 mph (45 km/h) and 85 mph (135 km/h).
8
l Vehicle speed falls below 25 mph (40 km/h)
8
l VSC is activated
8
l The sensor cannot operate correctly because it is covered in some way.
8
l The windshield wipers are operating at high speed.
8
l Actual vehicle speed is more than 10 mph (16 km/h) below the preset vehicle speed At this time, the memorized set speed is not retained.
9
l Vehicle speed falls below 25 mph (40 km/h)
9
l VSC is activated
9
n Radar sensor and grille cover
9
Always keep the sensor and grille cover clean to ensure that the vehicle-to-vehicle distance control operates properly. (Some ob...
9
n Certification
10
For vehicles sold in U.S.A.
10
FCC WARNING
10
Changes or modifications not expressly approved by the party responsible for compliance could void the user's authority to operate the equipment.
10
FCC RF exposure information
10
This device complies with the FCC RF exposure requirements.
10
For vehicles sold in Canada
10
Operation is subject to the following two conditions;
10
(1) This device may not cause interference, and
10
l In heavy traffic
11
l On roads with sharp bends
11
l On winding roads
11
l On slippery roads, such as those covered with rain, ice or snow
11
l Where there are sudden changes between sharp up and down gradients
11
l At entrances to expressways
11
l When weather conditions are bad enough that they may prevent the sensors from functioning correctly (fog, snow, sandstorm, etc.)
11
l Vehicles that cut in suddenly
11
l Vehicles traveling at low speeds
11
l Vehicles that are not moving
11
l Vehicles with small rear ends (trailers with no load on board etc.)
11
l When water or snow thrown up by the surrounding vehicles hinders the functioning of the sensor
12
l When your vehicle is pointing upwards (caused by a heavy load in the trunk, etc.)
12
l When the road curves or when the lanes are narrow
12
l Stick or attach anything to them
12
l Leave them dirty
12
l Disassemble, subject them to strong shocks
12
l Modify or paint them
12
For vehicles equipped with a navigation system, refer to the separate “Navigation System Owner’s Manual” for further details.
13
n Types of sensors
13
n Multi-information display (ÆP. 139)
13
l The buzzer beeps faster as the vehicle approaches an obstacle. When the vehicle comes within the following distance of the obstacle, the buzzer sounds continuously.
15
. There is dirt, snow or ice on the sensor.
17
. The sensor is frozen.
17
. The sensor is covered in any way.
17
. The vehicle is leaning considerably to one side.
17
. On an extremely bumpy road, on an incline, on gravel, or on grass.
17
. The vicinity of the vehicle is noisy due to vehicle horns, motorcycle engines, air brakes of large vehicles, or other loud noises producing ultrasonic waves.
17
. There is another vehicle equipped with parking assist sensors in the vicinity.
17
. The sensor is coated with a sheet of spray or heavy rain.
17
. The vehicle is equipped with a fender pole or wireless antenna.
17
. Towing eyelets are installed.
17
. The bumper or sensor receives a strong impact.
17
. The vehicle is approaching a tall or curved curb.
17
. Wires, fences, ropes etc.
17
. Cotton, snow and other materials that absorb radio waves
17
. Sharply-angled objects
17
. Low obstacles
17
. Tall obstacles with upper sections projecting outwards in the direction of your vehicle
17
n Customization that can be configured at Lexus dealer
18
l Do not use the sensor at speeds in excess of 6 mph (10 km/h).
18
Do not apply intensive bursts of water or steam to the sensor area. Doing so may result in the sensor malfunctioning.
18
ÆP. 176
20
If the vehicle gets stuck in fresh snow or mud, TRAC and VSC may reduce power from the engine to the wheels. You may need to turn the system off to enable you to rock the vehicle in order to free it.
21
. Vibrations may be felt through the vehicle body and steering.
22
. A motor sound may be heard after the vehicle comes to a stop.
22
. The brake pedal may pulsate slightly after the ABS is activated.
22
l The shift lever is in the D or S position.
23
l The brake pedal is not depressed.
23
n Reduced effectiveness of EPS
23
l The limits of tire gripping performance have been exceeded.
23
l When driving on dirt, gravel or snow-covered roads
23
l When driving with tire chains
23
l When driving over bumps in the road
23
Make sure that all tires are of the same size, brand, tread pattern and total load capacity. In addition, make sure that the tires are inflated to the recommended tire pressure level.
24
Using tires with any kind of problem or modifying the suspension will affect the driving assist systems, and may cause the system to malfunction.
24
Applies greater braking force in relation to how strongly the brake pedal is depressed.
25
. Vehicle speed is above 3 mph (5 km/h).
26
. The speed at which your vehicle is approaching the obstacle or oncoming vehicle exceeds 18 to 24 mph (30 to 40 km/h).
26
. Vehicle speed exceeds 9 mph (15 km/h).
26
. The system detects sudden braking or skidding.
26
. Vehicle speed is above 18 mph (30 km/h).
26
. The speed at which your vehicle is approaching the obstacle or the vehicle is greater than 18 to 24 mph (30 to 40 km/h).
26
l When there is an object by the roadside at the entrance to a curve
26
l When passing an oncoming vehicle on a curve
26
l When driving over a narrow iron bridge
26
l When there is a metal object on the road surface
26
l When driving on an uneven road surface
26
l When passing an oncoming vehicle on a left-turn
26
n When there is a malfunction in the system
26
l Keep the sensor and front grille clean at all times. Clean the sensor and front grille with a soft cloth so you do not mark or damage them.
27
l Do not subject the sensor or surrounding area to a strong impact. If the sensor moves even slightly off position, the system m...
27
l Do not disassemble the sensor.
27
l Stow cargo and luggage in the trunk whenever possible. Be sure all items are secured in place.
1
l Be careful to keep the vehicle level. Placing the weight as far forward as possible helps maintain vehicle balance.
1
l For better fuel economy, do not carry unnecessary weight.
1
Cargo capacity depends on the total weight of the occupants.
1
(1) Locate the statement “The combined weight of occupants and cargo should never exceed XXX kg or XXX lbs.” on your vehicle’s placard.
1
(2) Determine the combined weight of the driver and passengers that will be riding in your vehicle.
1
(3) Subtract the combined weight of the driver and passengers from XXX kg or XXX lbs.
1
(4) The resulting figure equals the available amount of cargo and luggage load capacity.
1
For example, if the “XXX” amount equals 1400 lbs. and there will be five 150 lb. passengers in your vehicle, the amount of available cargo and luggage load capacity is 650 lbs. (1400 - 750 (5 ¥ 150) = 650 lbs.)
1
Lexus does not recommend towing a trailer with your vehicle. Your vehicle is not designed for trailer towing.
2
In this condition, if 3 more passengers with the combined weight of 388 lb. (176 kg) get on, the available cargo and luggage load will be reduced as follows:
2
l Do not place anything on the package tray behind the rear seatback. Such items may be thrown about and possibly injure people in the vehicle during sudden braking or in an accident.
3
l Do not drive with objects on top of the instrument panel. They may interfere with the driver’s field of view or move during sh...
3
l Do not exceed the maximum axle weight rating or the total vehicle weight rating.
3
l Even if the total load of occupant's weight and the cargo load is less than the total load capacity, do not apply the load unevenly. Improper loading may cause deterioration of steering or braking control which may cause death or serious injury.
3
Cargo capacity may increase or decrease depending on the weight and the number of occupants.
4
n Total load capacity and seating capacity
4
Do not overload the vehicle. It may not only cause damage to the tires, but also degrade steering and braking ability, resulting in an accident.
4
. Engine oil
5
. Engine coolant
5
. Washer fluid
5
l Do not try to forcibly open a window or move a wiper that is frozen. Pour warm water over the frozen area to melt the ice. Wipe away the water immediately to prevent it from freezing.
5
l To ensure proper operation of the climate control system fan, remove any snow that has accumulated on the air inlet vents in front of the windshield.
5
l Remove any ice that has accumulated on the vehicle chassis.
5
l Regulations regarding the use of tire chains vary according to location and type of road. Always check local regulations before installing chains.
6
l Install and remove tire chains in a safe location.
7
l Install tire chains on the rear tires only. Do not install tire chains on front tires.
7
l Install the tire chains on rear tires as tightly as possible. Retighten chains after driving 1/4 - 1/2 mile (0.5 - 1.0 km).
7
l Use tires of the size specified for your vehicle.
7
l Maintain the recommended level of air pressure.
7
l Do not drive in excess of 75 mph (120 km/h), regardless of the type of snow tires being used.
7
l Do not drive in excess of the speed limit specified for the tire chains being used, or 30 mph (50 km/h), whichever is lower.
7
l Avoid driving on bumpy road surfaces or over potholes.
7
l Avoid sudden turns and braking, as use of chains may adversely affect vehicle handling.
7
The tire air pressure sensor may not function correctly when tire chains are fitted.
8
After towing, leave the engine in idle for at least 3 minutes before driving the vehicle.
11
n Necessary equipment and accessories
11
Press Ÿ (increase) or ⁄ (decrease) onto separately adjust the temperature for the passenger and driver sides (dual mode). Press to return the driver and passenger side temperatures to the same setting (simultaneous mode).
2
Press to turn the fan off.
2
The mode switches among (recycles air inside the vehicle), “AUTO” and (introduces air from outside the vehicle) modes each time the button is pressed.
4
When the system is switched to automatic mode, the air conditioning system operates automatically.
4
Center outlets
6
l The system may switch automatically to recirculated mode when the coolest temperature setting is selected in summer.
7
l Immediately after the switch is pressed, the fan may stop for a while until warm or cool air is ready to flow.
7
l Cool air may flow to the area around the upper body when the heater is on.
7
. Outside air mode does not switch to .
7
. The air conditioning system operates automatically.
7
. The operation cancels after 1 minute.
7
n Using cellular phones
2
. Do not take this unit apart or attempt to make any changes yourself. This is an intricate unit that uses a laser pickup to ret...
2
Take care not to spill drinks or other fluids over the audio system.
3
Search for desired stations by turning or pressing Ÿ or ⁄ on .
4
Preset stations will be played for 5 seconds each.
4
All stations with reception will be played for 5 seconds each.
5
When the desired station is reached, press the button once again.
5
The type of program changes each time the button is pressed.
5
l ROCK
5
l EASYLIS (Easy listening)
5
l CLS/JAZZ (Classical music and Jazz)
5
l R & B (Rhythm and Blues)
5
l INFORM (Information)
5
l RELIGION
5
Press and hold until SAT shows in the display.
6
The display changes as follows each time the switch is pressed.
6
AM Æ SAT1 Æ SAT2 Æ SAT3
6
Press .
7
Press and hold until you hear a beep.
7
The display will show up to 10 characters.
7
The display changes as follows each time the button is pressed.
7
l CH NAME
7
l TITLE (SONG/PROGRAM TITLE)
7
l Maintaining perfect radio reception at all times is difficult due to the continually changing position of the antenna, differences in signal strength and surrounding objects, such as trains, transmitters, etc.
8
l The radio antenna is mounted inside the rear window. To maintain clear radio reception, do not attach metallic window tinting or other metallic objects to the antenna wire mounted inside the rear window.
8
l XM® subscriptions For detailed information about XM® Satellite Radio or to subscribe: U.S.A. æ Visit on the web at www.xmradio.com or call 1-877-515-3987. Canada æ Visit on the web at www.xmradio.ca or call 1-877-438-9677.
8
l Radio ID You will need the radio ID when activating XM® service or reporting a problem. Select “CH000” using , and the receiver's 8-character ID number will appear.
8
l Satellite tuner The tuner supports only Audio Services (Music and Talk) and the accompanying Text Information of XM® Satellite Radio.
8
n If the satellite radio does not operate normally
9
n Certifications for the radio tuner
10
l Reorienting or relocate the receiving antenna.
10
l Increasing the separation between the equipment and receiver.
10
l Connecting the equipment into an outlet on a circuit different from that to which the receiver is connected.
10
The display changes from “WAIT” to “LOAD”.
11
Repeat the procedure for the remaining CDs.
12
The first ten seconds of each track will be played.
12
The first ten seconds of the first track on each CD will be played.
13
Each time the switch is pressed, the display changes in the order of Track no./ Elapsed time Æ CD title Æ Track name.
13
n When “LOAD”, “ERROR” or “WAIT” is shown on the display
14
“LOAD”: This indicates that the CD player has completed loading the CD.
14
n Lens cleaners
14
Do not use the following types of CDs, 3 in. (8 cm) CD adapters or Dual Discs. Doing so may damage the CD player and/or the CD insert/eject function.
15
l CDs that have a diameter that is not 4.7 in. (12 cm).
15
l Low-quality and deformed CDs.
15
l CDs with a transparent or translucent recording area.
15
l Do not insert anything other than CDs into the CD slot.
16
l Do not apply oil to the CD player.
16
l Store CDs away from direct sunlight.
16
l Never try to disassemble any part of the CD player.
16
l Do not insert more than one CD at a time.
16
Press .
18
When the desired file is reached, press the switch once again.
18
Press(RPT).
18
Each time the switch is pressed, the display changes in the order of Folder no./File no./Elapsed time Æ Folder name Æ File name Æ Album title (MP3 only) Æ Track title Æ Artist name.
18
n When “LOAD”, “ERROR”, “WAIT” or “NO MUSIC” is shown on the display.
19
“LOAD”: This indicates that the CD player has completed loading the CD.
19
“ERROR”: Make sure the label of the displayed disc is facing up, and then reinsert it in the player.
19
n MP3 and WMA files
20
MP3 (MPEG Audio LAYER 3) is a standard audio compression format.
20
Files can be compressed to approximately 1/10 of their original size by using MP3 compression.
20
WMA (Windows MediaTM Audio) is a Microsoft audio compression format.
20
. Compatible standards MP3 (MPEG1 LAYER3, MPEG2 LSF LAYER3)
20
. Compatible sampling frequencies MPEG1 LAYER3: 32, 44.1, 48 (kHz) MPEG2 LSF LAYER3: 16, 22.05, 24 (kHz)
20
. Compatible standards WMA Ver. 7, 8, 9
20
. Compatible sampling frequencies 32, 44.1, 48 (kHz)
20
l Compatible media
20
l Compatible disc formats
21
. Maximum directory hierarchy: 8 levels
21
. Maximum length of folder names/file names: 32 characters
21
. Maximum number of folders: 192 (including the root)
21
. Maximum number of files per disc: 255
21
l ID3 and WMA tags
21
ID3 tags can be added to MP3 files, making it possible to record the track title and artist name, etc.
21
l MP3 and WMA playback
22
Do not use the following types of CDs, 3 in. (8 cm) CD adapters or Dual Discs. Doing so may damage the CD player and render the CD insert/eject function unusable.
23
l CDs that have a diameter that is not 4.7 in. (12 cm)
23
l Low-quality and deformed CDs
23
l CDs with a transparent or translucent recording area
23
l Do not insert anything other than CDs into the CD slot.
24
l Do not apply oil to the CD player.
24
l Store CDs away from direct sunlight.
24
l Never try to disassemble any part of the CD player.
24
l Do not insert more than one CD at a time.
24
Type A
25
Type B
25
ASL automatically adjusts the volume and tone quality according to the noise level as you drive your vehicle.
26
The sound feel setting can be changed to produce the best sound for each listening position.
26
Press(position selector) to change the setting.
26
Press Pressing the button changes the sound mode in the following order.
26
*: The sound quality level is adjusted individually in each AM×FM or CD mode.
27
n Surround (type B only)
27
n When using a portable audio device connected to the power outlet
28
The audio system can be turned off by holding the switch down for 1 second or more.
29
Press when the audio system is turned on. The audio source changes as follows each time the switch is pressed.
29
FM1ÆFM2ÆCD changerÆAUXÆAMÆSAT1ÆSAT2ÆSAT3
29
on to increase the volume and - to decrease the volume.
29
Hold down the switch to continue increasing or decreasing the volume.
29
To scan for receivable stations, press and hold the switch until you hear a beep.
30
Press to select the CD mode.
30
Press Ÿ or ⁄ on to select the desired track/file.
30
Front personal lights (ÆP. 234)
1
Front interior light (ÆP. 234)
1
Front overhead courtesy light
1
Rear personal lights (ÆP. 234)
1
Rear interior light
1
Rear overhead courtesy light
1
Shift lever lighting (when “ENGINE START STOP” switch is in ACCESSORY or IGNITION ON mode)
1
Front foot well lighting
1
Front door courtesy lighting
2
Turning the instrument panel light control knob fully to the left disables the shift lever lighting and front foot well lighting.
2
l Front overhead courtesy light
3
l Rear overhead courtesy light
3
l Front interior light
3
l Rear interior lights
3
l Front foot well lighting
3
l Front door courtesy lighting
3
l Front overhead courtesy light
3
l Rear overhead courtesy light
3
n Customization that can be configured at Lexus dealer
3
Setting (e.g. The time elapsed before lights turn off) can be changed. (Customizable features ÆP. 436)
3
Models without an electric moon roof
4
Models with an electric moon roof
4
Front (models without an electric moon roof)
4
Front (models with an electric moon roof)
5
Glove box
1
Console boxes
1
Cup holders
1
n Trunk opener main switch
2
Keep the glove box closed. Injuries may result in the event of an accident or sudden braking.
2
Do not leave the overhead console open while driving. Items may fall out and cause injury.
4
Front (type A)
4
n The clock is displayed when
3
The “ENGINE START STOP” switch is in ACCESSORY or IGNITION ON mode.
3
The satellite switches can be used to change the settings of various features. Settings are shown on the multi-information display.
4
l Intuitive parking assist: When the “ENGINE START STOP” switch is in IGNITION ON mode.
6
l Items other than the above: When the “ENGINE START STOP” switch is in IGNITION ON mode and the vehicle is stopped.
6
n Display
6
The display will return to the original display if the satellite switches are not operated for an extended period. Even if the d...
6
l Fully extinguish matches and cigarettes before putting them in the ashtray, then make sure the ashtray is fully closed.
7
l Do not place paper or any other type of flammable object in the ashtray.
7
n The cigarette lighter can be used when
8
l Do not touch the metal parts of the cigarette lighter.
8
l Do not hold the cigarette lighter down. It could overheat and cause a fire.
8
n The power outlet can be used when
9
Do not use the power outlet longer than necessary when the engine is not running.
9
n When not in use
10
. Babies, small children, the elderly, the sick and the disabled
11
. Persons with sensitive skin
11
. Persons who are fatigued
11
. Persons who have taken alcohol or drugs that induce sleep (sleeping drugs, cold remedies, etc.)
11
n When not in use
12
. Babies, small children, the elderly, the sick and the disabled
13
. Persons with sensitive skin
13
. Persons who are fatigued
13
. Persons who have taken alcohol or drugs that induce sleep (sleeping drugs, cold remedies, etc.)
13
n Reverse operation feature
15
l The switch is pressed again.
15
n The rear sunshade can be used when
15
l Do not place excessive load on the motor or other components.
16
l Do not place objects where they may hinder opening and closing operations.
16
l Do not attach items to the rear sunshade.
16
l Keep the opening clean and clear of obstructions.
16
l Make sure the floor mat is properly placed on the vehicle carpet and the correct side faces upward.
19
l Do not place floor mats on top of existing mats.
19
n Cargo hooks
20
n Shopping bag hooks
20
n First-aid kit storage belt
20
The garage door opener (HomeLink‚ Universal Transceiver) is manufactured under license from HomeLink‚.
23
Refer to the operation manual supplied with the garage door opener for the location of the training button.
25
If the garage door opens, the programming process is complete. If the door does not open, press and release the button a third time. This third press and release will complete the programming process by opening the garage door.
25
The ceiling mounted garage door opener motor should now recognize the HomeLink‚ transceiver and operate the garage door.
25
Keep the indicator light on the HomeLink‚ in view while programming.
25
Press and hold the selected HomeLink‚ button.
25
Repeatedly press and release (cycle) the device’s remote control button for two seconds each until step 4 is complete.
25
When the indicator light on the HomeLink‚ compatible transceiver start to flashing rapidly, release the buttons.
25
Test the operation of the HomeLink‚ by pressing the newly programmed button. Check to see if the gate/device operates correctly.
26
l Install a new battery in the transmitter.
27
l The battery side of the transmitter must be pointed away from the HomeLink‚.
27
n Certification for the garage door opener
27
This device complies with Part 15 of the FCC Rules and with RSS-210 of the IC Rules. Operation is subject to the following two c...
27
Do not use the HomeLink‚ Compatible Transceiver with any garage door opener or device that lacks safety stop and reverse feature...
27
The compass on the inside rear view mirror indicates the direction in which the vehicle is heading.
28
Stop the vehicle where it is safe to drive in a circle.
29
l The vehicle is stopped immediately after turning.
30
l The vehicle is on an inclined surface.
30
l The vehicle is in a place where the earth's magnetic field is subject to interference by artificial magnetic fields (undergrou...
30
l The vehicle has become magnetized. (There is a magnet or metal object near the inside rear view mirror.)
30
l The battery has been disconnected.
30
l Do not perform circling calibration of the compass in a place where the earth's magnetic field is subject to interference by artificial magnetic fields.
31
l Working from top to bottom, liberally apply water to the vehicle body, wheel wells and underside of the vehicle to remove any dirt and dust. Wash the vehicle body using a sponge or soft cloth, such as a chamois.
1
l For hard-to-remove marks, use car wash soap and rinse thoroughly with water.
1
l Fold the mirrors back before washing the vehicle.
1
l Do not allow the nozzles of the car wash to come within close proximity of the windows.
1
l Before car wash, check that the fuel filler door on your vehicle is closed properly.
1
l Clean the mirrors using car shampoo or glass cleaner that does not contain silicone or an abrasive compound, and rinse thoroughly with water.
2
. After driving near the sea coast
2
. After driving on salted roads
2
. If you see coal tar or tree sap on the paint surface
2
. If you see dead insects or insect droppings on the paint
2
. After driving in an area contaminated with soot, oily smoke, mine dust, iron powder or chemical substances
2
. If the vehicle becomes heavily soiled in dust or mud
2
. If liquids such as benzene and gasoline are spilled on the paint surface
2
Exhaust gasses cause the exhaust pipe to become quite hot.
2
l Wash carefully. Do not use organic substances or scrub with a hard brush. This may damage the surfaces of the lights.
3
When lifting the wiper arms away from the windshield, pull the driver side wiper arm upward first, and repeat for the passenger side. When returning the wipers to their original position, do so from the passenger side first.
3
n When using an automatic car wash
3
Set the wiper switch to “OFF”. If the wiper switch is in “AUTO”, the wipers may operate and the wiper blades may be damaged.
3
Use a diluted water solution of approximately 5% neutral wool detergent.
4
l Wring out any excess water from the cloth and thoroughly wipe off all remaining traces of detergent.
4
l Remove loose dirt using a vacuum cleaner.
4
n Seat belts
5
l Be careful not to splash or spill liquid on the floor.
5
l Remove any dust or dirt on leather surfaces immediately.
6
l Do not expose the vehicle to direct sunlight for extended periods of time. Park the vehicle in the shade, especially during summer.
6
The use of Lexus Repair Manuals is recommended.
1
For details about warranty coverage, see the separate “Owner’s Guide”, “Warranty and Services Guide”, “Owner’s Manual Supplement” or “Warranty Booklet”.
1
l Lexus technicians are well-trained specialists and are kept up to date with the latest service information. They are well informed about the operations of all systems on your vehicle.
2
l Engine exhaust, some of its constituents, and a wide variety of automobile components contain or emit chemicals known to the State of California to cause cancer and birth defects and other reproductive harm. Work in a well ventilated area.
2
l Oils, fuels and fluids contained in vehicles as well as waste produced by component wear contain or emit chemicals known to th...
2
Turn the engine off and ensure that there is adequate ventilation before performing maintenance checks.
5
l When the battery is disconnected or discharged
6
Readiness codes that are set during ordinary driving are erased. Also, depending on your driving habits, the readiness codes may not be completely set.
6
l When the fuel tank cap is loose
6
l Keep hands, clothing, and tools away from the moving fan and engine drive belt.
2
l Be careful not to touch the engine, radiator, exhaust manifold, etc. right after driving as they may be hot. Oil and other fluids may also be hot.
2
l Do not leave anything that may burn easily, such as paper or rags, in the engine compartment.
2
l Do not smoke, cause sparks or expose an open flame to fuel or the battery. Fuel and battery fumes are flammable.
2
Check that the hood is fully closed and locked. If the hood is not locked properly it may open while the vehicle is in motion and cause an accident, which may result in death or serious injury.
4
2WD
5
l Do not use the jack that was supplied with your vehicle.
6
l Do not put any part of your body or get underneath the vehicle supported only by the floor jack. Always use automotive jack stands on a solid, level, surface.
6
l Do not start the engine while the vehicle is supported by the floor jack.
6
l Stop the vehicle on level firm ground, firmly set the parking brake and put the shift lever in P (automatic) or R (manual).
6
l Make sure to set the floor jack properly at the jack point. Raising the vehicle with an improperly positioned floor jack will damage the vehicle and may cause the vehicle to fall off the floor jack.
6
l Do not raise the vehicle while someone is in the vehicle.
6
Battery (ÆP. 302)
7
Engine oil level dipstick (ÆP. 295)
7
Engine oil filler cap (ÆP. 295)
7
Brake fluid reservoir (ÆP. 301)
7
Fuse boxes (ÆP. 327)
7
Washer fluid tank (ÆP. 305)
7
Electric cooling fans
7
Condenser (ÆP. 301)
7
Radiator (ÆP. 301)
7
Battery (ÆP. 302)
8
Engine oil level dipstick (ÆP. 295)
8
Engine oil filler cap (ÆP. 295)
8
Brake fluid reservoir (ÆP. 301)
8
Fuse boxes (ÆP. 327)
8
Washer fluid tank (ÆP. 305)
8
Electric cooling fans
8
Condenser (ÆP. 301)
8
Radiator (ÆP. 301)
8
Front
9
Park the vehicle on level ground. After turning off the engine, wait a few minutes for the oil to drain back into the bottom of the engine.
10
Wipe the dipstick clean.
10
Reinsert the dipstick fully.
10
Holding a rag under the end, pull the dipstick out and check the oil level.
10
Remove the oil filler cap.
11
It takes about 1.6 qt. (1.5 L, 1.3 lmp.qt.) to raise the oil level from low to full on the dipstick.
11
l The amount of engine oil consumed depends on the oil viscosity, the quality of the oil and the way the vehicle is driven.
13
l More oil is consumed under driving conditions such as high speeds and frequent acceleration and deceleration.
13
l A new engine consumes more oil.
13
l When judging the amount of oil consumption, keep in mind that the oil may have become diluted, making it difficult to judge the true level accurately.
13
l Oil consumption: Max. 1.1 qt./600 miles, 0.9 lmp.qt./600 miles (1.0 L per 1000 km)
13
l If you consume more than 1.1 qt. (1.0 L, 0.9 lmp.qt.) every 600 miles (1000 km), contact your Lexus dealer.
13
Switch the display to the odometer (ÆP. 130) when the engine is running.
13
Turn the “ENGINE START STOP” switch OFF.
13
l Used engine oil contains potentially harmful contaminants which may cause skin disorders such as inflammation or skin cancer, ...
13
l Dispose of used oil and filters only in a safe and acceptable manner. Do not dispose of used oil and filters in household tras...
13
l Be careful not to spill engine oil on the vehicle components.
14
l Avoid overfilling, or the engine could be damaged.
14
l Check the oil level on the dipstick every time you refill the vehicle.
14
n Coolant selection
15
Only use “Toyota Super Long Life Coolant” or similar high-quality ethylene glycol- based non-silicate, non-amine, non-nitrite, and non-borate coolant with long-life hybrid organic acid technology.
15
U.S.A.: “Toyota Super Long Life Coolant” is a mixture of 50% coolant and 50% deionized water. (Enabled: -31°F [-35°C])
15
Canada : “Toyota Super Long Life Coolant” is a mixture of 55% coolant and 45% deionized water. (Enabled: -44°F [-42°C])
15
n Brake fluid can absorb moisture from the air
16
Take care because brake fluid can harm your hands or eyes and damage painted surfaces. If fluid gets in your eyes, flush your eyes with clean water immediately.
17
It is normal for the brake fluid level to go down slightly as the brake pads wear or when the fluid level in the accumulator is high. If the reservoir needs frequent refilling, it may indicate a serious problem.
17
l If recharging with the battery installed on the vehicle, be sure to disconnect the ground cable.
18
l Make sure the power switch on the charger is off when connecting and disconnecting the charger cables to the battery.
18
Shift the shift lever to P (automatic) or depress the brake pedal with the shift lever in N (manual).
18
Open and close any of the doors.
18
l Do not cause sparks by touching the battery terminals with tools.
19
l Do not smoke or light a match near the battery.
19
l Avoid contact with eyes, skin and clothes.
19
l Never inhale or swallow electrolyte.
19
l Wear protective safety glasses when working near the battery.
19
l If electrolyte gets in your eyes Flush your eyes with clean water for at least 15 minutes and get immediate medical attention. If possible, continue to apply water with a sponge or cloth while traveling to the nearest medical facility.
19
l If electrolyte gets on your skin Wash the affected area thoroughly. If you feel pain or burning, get medical attention immediately.
19
l If electrolyte gets on your clothes It can soak through clothing on to your skin. Immediately take off the clothing and follow the procedure above if necessary.
19
Dilute washer fluid with water as necessary. Refer to the freezing temperatures listed on the washer fluid tank.
20
Replace or rotate tires in accordance with maintenance schedules and treadwear.
21
2WD models with 16-inch tires and AWD models
21
2WD models with 18-inch tires
21
2WD models with 17-inch tires
22
Your Lexus is equipped with a tire pressure warning system that uses tire pressure warning valves and transmitters to detect low tire inflation pressure before serious problems arise. (ÆP. 362, 370)
22
When replacing tires or wheels, tire pressure warning valves and transmitters must also be installed.
23
l When rotating the tires on vehicles differing with front and rear tire inflation pressures.
23
l When changing the tire inflation pressure by changing traveling speed.
23
l When changing the tire size.
23
Make sure to adjust the tire pressure to the specified cold tire inflation pressure level. The tire pressure warning system will operate based on this pressure level.
24
Turn the “ENGINE START STOP” switch to IGNITION ON mode.
24
Wait for a few minutes with the IGNITION ON mode, and then turn the “ENGINE START STOP” switch OFF.
24
2 sets of tire pressure warning valve and transmitter ID codes can be registered. Once a second set of tires is registered at “2ND”, you can switch between tire set settings simply by pressing the tire pressure warning select switch.
25
There are 2 settings:
25
“MAIN” position: The ID code of the tire pressure warning valve and transmitter on the tires originally installed on the vehicle is registered.
25
l You have tire damage such as cuts, splits, cracks deep enough to expose the fabric or bulges indicating internal damage
26
n Low profile tires (models not equipped with 16-inch tires)
26
n Tire types
27
1 Summer tires
27
Summer tires are high-speed performance tires best suited to highway driving under dry conditions. Since summer tires do not hav...
27
2 All season tires
27
All season tires are designed to provide better traction in snow and to be adequate for driving in most winter conditions, as we...
27
l When operating the tire pressure warning reset switch, the tire pressure warning light does not flash 3 times and the setting message does not appear on the multi-information display.
27
l After carrying out the initialization procedure, the tire pressure warning light blinks for 1 minute then stays on after driving for about 20 minutes.
27
n Tire pressure warning system certification
28
For vehicles sold in the U.S.A.
28
l Reorient or relocate the receiving antenna.
28
l Increase the separation between the equipment and receiver.
28
l Connect the equipment into an outlet on a circuit different from that to which the receiver is connected.
28
l Consult the dealer or an experienced radio/TV technician for help.
28
FCC WARNING: Changes or modifications not expressly approved by the party responsible for compliance could void the user's authority to operate the equipment.
28
For vehicles sold in Canada
28
l Do not mix tires of different makes, models, tread patterns or treadwear.
29
l Do not use tire sizes other than those recommended by Lexus.
29
l Do not mix radial, bias-belted, or bias-ply tires.
29
l Be sure to use proper tire inflation pressure. If tires are under-inflated, they may be damaged more severely.
30
Remove the tire valve cap.
32
Press the tip of the tire pressure gauge onto the tire valve.
32
Read the pressure using the graduations of the gauge.
32
If the tire inflation pressure is not within the recommended levels, adjust the pressure. If you add too much air, press the center of the valve to lower.
32
l Reduced fuel efficiency
33
l Reduced driving comfort and tire life
33
l Reduced safety
33
l Check only when the tires are cold. If your vehicle has been parked for at least 3 hours and has not been driven for more than 1 mile or 1.5 km, you will get an accurate cold tire inflation pressure reading.
33
l Always use a tire pressure gauge. The appearance of the tire can be misleading. In addition, tire inflation pressures that are even just a few pounds off can degrade ride and handling.
33
l Do not bleed or reduce tire inflation pressure after driving. It is normal for the tire inflation pressure to be higher after driving.
33
l Excessive wear
34
l Uneven wear
34
l Poor handling
34
l Possibility of blowouts resulting from overheated tires
34
l Poor sealing of the tire bead
34
l Wheel deformation and/or tire separation
34
Be sure to reinstall the tire valve caps. Without the valve caps, dirt or moisture could get into the valve and cause air leakage, which could result in an accident. If the caps have been lost, replace them as soon as possible.
34
. Wheels of different sizes or types
35
. Used wheels
35
l Use only Lexus wheel nuts and wrenches designed for use with your aluminum wheels.
35
l When rotating, repairing or changing your tires, check that the wheel nuts are still tight after driving 1000 miles (1600 km).
35
n When replacing wheels
35
l Do not use wheels that are a different size from those recommended in the Owner’s Manual, as this may result in loss of handling control.
36
l Because tire repair or replacement may affect the tire pressure warning valves and transmitters, make sure to have tires servi...
36
l Ensure that only Genuine Lexus wheels are used on your vehicle. Tire pressure warning valves and transmitters may not work properly with non- genuine wheels.
36
The air conditioning filter case cannot be removed with the system in the outside air mode.
37
Turn the “ENGINE START STOP” switch OFF.
37
n If air flow from the vents decreases dramatically
38
l When using the air conditioning system, make sure that a filter is always installed.
39
l When cleaning the filter, do not clean the filter with water.
39
l Flathead screwdriver
40
l Small Phillips-head screwdriver
40
l The smart access system with push-button start and wireless remote control will not function properly.
41
l Batteries can be purchased at your Lexus dealer, jewelers, or camera stores.
41
l Replace only with the same or equivalent type recommended by a Lexus dealer.
41
l Always work with dry hands. Moisture may cause the battery to rust.
41
l Do not touch or move any other components inside the remote control.
41
Turn the “ENGINE START STOP” switch OFF.
42
Remove the engine compartment cover. (ÆP. 294)
42
Open the fuse box cover.
42
Engine compartment (type A)
42
Engine compartment (type B)
42
After a system failure, see “Fuse layout and amperage ratings” (ÆP. 331) for details about which fuse to check.
43
Check if the fuse has blown.
44
Type A
44
Type B
44
Type C
44
Type D
45
n Engine compartment (type A)
46
n Engine compartment (type B)
49
l If the lights do not turn on even after the fuse has been replaced, a bulb may need replacement. (ÆP. 342)
54
l If the replaced fuse blows again, have the vehicle inspected by your Lexus dealer.
54
n If there is an overload in the circuits
54
l Observe the following precautions. Failing to do so may cause damage, and possibly a fire or injury.
55
l Never use a fuse of a higher amperage rating than indicated, or use any other object in place of a fuse.
55
l Always use a genuine Lexus fuse or equivalent. Never replace a fuse with a wire, even as a temporary fix. This can cause extensive damage or even fire.
55
Have the cause of electrical overload determined and repaired by your Lexus dealer.
55
Make sure the vehicle has a full tank of gas and the area around the headlight is not deformed.
56
Park the vehicle on level ground.
56
Sit in the driver’s seat.
56
ÆP. 294
57
n Front bulb locations
57
n Rear bulb locations
57
n Headlight high beams
58
n Parking lights
59
n Back-up light
59
l Headlight low beams (halogen bulbs)
61
l Headlight high and low beams (discharge bulbs)
61
l Front fog lights
61
l Front turn signal lights
61
l Front side marker lights
61
l Stop/tail lights
61
l Tail lights
61
l Rear side marker lights
61
n When replacing the front left headlight and parking light bulbs
62
l Large drops of water are built up on the inside of the lens.
62
l Water has built up inside the headlight.
62
n Discharge headlights (if equipped)
62
l Turn off the headlights. Do not attempt to replace the bulb immediately after turning off the headlights. The bulbs become very hot and may cause burns.
63
l Do not touch the glass portion of the light bulb with bare hands. Hold the bulb by the plastic or metal portion. If the bulb is scratched or dropped it may blow out or crack.
63
l Fully install light bulbs and any parts used to secure them. Failing to do so may result in heat damage, fire, or water entering the headlight unit. This may damage the headlights or cause condensation to build up on the lens.
63
l Contact your Lexus dealer before replacing discharge headlights (including light bulbs).
63
l The engine is running, but the vehicle will not move.
1
Release the parking brake.
2
Shift the shift lever to N.
2
l Use extreme caution when towing the vehicle. Avoid sudden starts or erratic driving maneuvers which place excessive stress on the emergency towing eyelets and the cables or chains.
2
n Location of the emergency towing eyelet
3
Do not tow with a sling type truck, either from the front or rear.
4
From the front
5
l Do not tow the vehicle from the rear with the “ENGINE START STOP” switch OFF. The steering lock mechanism is not strong enough to hold the front wheel straight.
6
l When raising the vehicle from the rear, ensure adequate ground clearance for towing at the opposite end of the raised vehicle. Without adequate clearance, the vehicle could be damaged while being towed from the rear.
6
l Fluid leaks under the vehicle (Water dripping from the air conditioning after use is normal.)
7
l Flat-looking tires or uneven tire wear
7
l Changes in exhaust sound
7
l Excessive tire squeal when cornering
7
l Strange noises related to the suspension system
7
l Engine missing, stumbling or running rough
7
l Appreciable loss of power
7
l Vehicle pulls heavily to one side when braking
7
l Vehicle pulls heavily to one side when driving on a level road
7
l Engine speed
9
l Whether the brake pedal was applied or not
9
l Vehicle speed
9
l To what extent the accelerator pedal was depressed
9
l Position of the transmission shift lever
9
l Whether the driver and front passenger wore seat belts or not
9
l Driver's seat position
9
l SRS airbag deployment data
9
l SRS airbag system diagnostic data
9
l Front passenger’s occupant classification
9
l An agreement from the vehicle's owner (or the leasing company for a leased vehicle) is obtained
10
l Officially requested by the police or other authorities
10
l Used as a defense for Lexus in a law suit
10
l Use the data for research on Lexus vehicle safety performance
10
l Disclose the data to a third party for research purposes without disclosing details of the vehicle owner, and only when it is deemed necessary
10
ÆP. 373
1
The following warnings indicate the possibility of damage to the vehicle that may lead to an accident. Immediately stop the vehicle in a safe place and contact your Lexus dealer.
2
ÆP. 373
4
The driver’s and front passenger’s seat belts reminder sounds to alert the driver and front passenger that his or her sear belt ...
4
l Is the fuel empty? If it is, fill the fuel tank immediately.
5
l If luggage is placed on the front passenger seat, the front passenger detection sensor may cause the warning light to flash and the warning buzzer to sound, even if a passenger is not sitting in the seat.
5
l If a cushion is placed on the seat, the sensor may not detect a passenger, and the warning light may not operate properly.
5
n If the tire pressure warning system is inoperative
6
l If tires not equipped with tire pressure warning valves and transmitters are used
6
l If the ID code on the tire pressure warning valves and transmitters is not registered in the tire pressure warning computer
6
l If a different set of tires has been selected using the satellite switch.
6
l If electronic devices or facilities using similar radio wave frequencies are nearby
6
l If a radio set at similar frequencies is in use in the vehicle
6
l If there is a lot of snow or ice on the vehicle, in particular around the wheels or wheel housings
6
l If non-genuine Lexus wheels are used (Even if you use Lexus wheels, the tire pressure warning system may not work properly with some types of tires.)
6
l If tire chains are used
6
n If the tire pressure warning light comes on after blinking for 1 minute frequently
6
l Stop your vehicle in a safe place as soon as possible. Adjust the tire inflation pressure immediately.
7
l If the tire pressure warning light comes on even after tire inflation pressure adjustment, it is probable that you have a flat...
7
Each tire, including the spare (if provided), should be checked monthly when cold and inflated to the inflation pressure recomme...
8
As an added safety feature, your vehicle has been equipped with a tire pressure monitoring system (TPMS-tire pressure warning sy...
8
Please note that the TPMS (tire pressure warning system) is not a substitute for proper tire maintenance, and it is the driver's...
8
Your vehicle has also been equipped with a TPMS (tire pressure warning system) malfunction indicator to indicate when the system...
8
If any of the warning light turns on again after performing the following actions, contact your Lexus dealer.
10
A buzzer sounds and a warning message is shown on the multi-information display. The following warnings indicate the possibility...
10
A buzzer sounds and a warning message is shown on the multi-information display. Failing to investigate the cause of the followi...
11
l When your vehicle and the vehicle ahead are traveling at the same speed or the vehicle ahead is traveling more quickly than your vehicle
18
l When the vehicle ahead is traveling at a very low speed
18
l Immediately after cruise control speed is set
18
*: If the engine does not start when the electronic key is inside the vehicle, the electronic key battery may be depleted or there may be difficulties receiving the signal from the key. (ÆP. 26)
22
l Stop the vehicle on a hard, flat surface.
23
l Set the parking brake.
23
l Shift the shift lever to P (automatic) or R (manual).
23
l Stop the engine.
23
l The compact spare tire is identified by the label “TEMPORARY USE ONLY” on the tire sidewall. Use the compact spare tire temporarily only in an emergency.
28
l Make sure to check the tire pressure of the compact spare tire. (ÆP. 415)
28
Replace a front tire with the compact spare tire.
28
Replace the flat rear tire with the tire removed from the front of the vehicle.
28
Fit tire chains to the rear tires.
28
n After completing the tire change
28
l Do not use the tire jack for any purpose other than replacing tires or installing and removing tire chains.
29
l Only use the tire jack that comes with this vehicle for replacing a flat tire. Do not use it on other vehicles, and do not use other tire jacks for replacing tires on this vehicle.
29
l Always check that the tire jack is securely set to the jack point.
29
l Do not put any part of your body under the vehicle supported by a jack.
29
l Do not start or run the engine while your vehicle is supported by the jack.
29
l Do not raise the vehicle while someone is in it.
29
l When raising the vehicle, do not put an object on or under the jack.
29
l Do not raise the vehicle to a height greater than that required to replace the tire.
29
l Use a jack stand if it is necessary to get under the vehicle.
29
l Never use oil or grease on the wheel bolts or wheel nuts. The oil or grease can cause the wheel nuts to loosen, causing a serious accident. Remove any oil or grease on the wheel bolts or wheel nuts.
29
l Remember that your compact spare tire is specifically designed for use with your vehicle. Do not use your compact spare tire on another vehicle.
30
l Do not use two compact spare tires simultaneously.
30
l Replace the compact spare tire with a standard tire as soon as possible.
30
Do not drive at speeds in excess of 50 mph (80 km/h) when a compact spare tire is installed on the vehicle.
30
l ABS & brake assist
30
l VSC
30
l TRAC
30
Do not use liquid sealants on flat tires.
31
l There may not be sufficient fuel in the vehicle’s tank. Refuel the vehicle.
32
l The engine may be flooded. Try to restart the engine once more following correct starting procedures. (ÆP. 117)
32
l The battery may be discharged. (ÆP. 397)
32
l One or both of the battery terminals may be disconnected.
32
Set the parking brake.
33
Turn the “ENGINE START STOP” switch to ACCESSORY mode.
33
Depress the brake pedal.
33
Doors
35
Shift the shift lever to P and apply the brakes.
36
To change “ENGINE START STOP” switch modes: Within 10 seconds of the buzzer sounding, release the brake pedal and press the “ENGINE START STOP” switch. Modes can be changed each time the switch is pressed. (ÆP. 117)
36
Shift the shift lever to N and depress the clutch pedal.
37
To change “ENGINE START STOP” switch modes: Within 10 seconds of the buzzer sounding, release the clutch pedal and press the “ENGINE START STOP” switch. Modes can be changed each time the switch is pressed. (ÆP. 117)
37
n Stopping the engine
37
n Replacing the key battery
37
If required, remove all vent plugs from the booster battery. Lay a cloth over the open vents on the booster battery. (This helps reduce the explosion hazard, personal injuries and burns.)
38
) battery terminal on your vehicle
38
) battery terminal on the second vehicle
38
Start the engine of the second vehicle. Increase the engine speed slightly and maintain at that level for approximately 5 minutes to recharge the battery of your vehicle.
38
Open and close any of the doors with the “ENGINE START STOP” switch OFF.
38
Maintain the engine speed on the second vehicle and turn the “ENGINE START STOP” switch to IGNITION ON mode, then start the vehicle’s engine.
39
l Turn off the headlights and the audio system while the engine is off.
39
l Turn off any unnecessary electrical components when the vehicle is running at a low speed for an extended period, such as in heavy traffic, etc.
39
n When the battery is removed or discharged
39
l Make sure the jumper cable is connected to the correct terminal and that it is not unintentionally in contact with any part other than the intended terminal.
39
” and “-” terminals.
39
l When working with the battery, always wear safety glasses and take care not to allow any battery fluids (acid) to come into contact with skin, clothing or the vehicle body.
40
l Do not lean over the battery
40
l In the event that battery fluid comes into contact with the skin or eyes, immediately wash the affected area with water and seek medical attention. Place a wet sponge or cloth over the affected area until medical attention can be received.
40
l Always wash your hands after handling the battery support, terminals, and other battery-related parts.
40
Stop the vehicle in a safe place and turn off the automatic air conditioning system.
41
Check to see if steam is coming out from under the hood.
41
If you see steam: Stop the engine and carefully lift the hood.
41
If you do not see steam: Leave the engine running and carefully lift the hood.
41
Remove the engine compartment cover. (ÆP. 294)
41
Check to see if the cooling fan is operating.
41
If the fan is operating: Wait until the temperature of the engine (shown on the instrument cluster) begins to fall and then stop the engine.
41
l The engine coolant temperature gauge enters the red zone or a loss of power is experienced.
42
l Keep hands and clothing away from the fan and other belts while the engine is running.
42
Stop the engine. Set the parking brake and put the selector lever in P (vehicles with an automatic transmission) or N (vehicles with a manual transmission).
43
Remove the mud, snow, or sand from around the stuck tire.
43
Place wood, stones or some other material to help provide traction under the tires.
43
l Avoid spinning the wheels and do not rev the engine.
44
The vehicle identification number (VIN) is the legal identifier for your vehicle. This is the primary identification number for your Lexus. It is used in registering the ownership of your vehicle.
2
The engine number is stamped on the engine block as shown.
3
*: “Toyota Genuine Differential gear oil LT” is filled in your Lexus vehicle at factory fill. Use Lexus approved “Toyota Genuine...
7
*: The fluid capacity is provided as a reference. If replacement is necessary, contact your Lexus dealer.
8
*1: Minimum pedal clearance when depressed with a force of 110 lbf (490 N, 50 kgf) while the engine is running.
9
*2: Parking brake pedal travel when depressed with a force of 67.4 lbf (300 N, 30.6 kgf).
9
*3: Parking brake lever travel when pulled up with a force of 45.0 lbf (200 N, 20.4 kgf).
9
*: When driving at high speeds above 100 mph (160 km/h), in countries where such speeds are permitted by law, add 5.8 psi (40 kP...
10
*: When driving at high speeds above 100 mph (160 km/h), in countries where such speeds are permitted by law, add 4.5 psi (30 kP...
11
*: When driving at high speeds above 100 mph (160 km/h), in countries where such speeds are permitted by law, add 7.2 psi (50 kP...
12
*: If equipped
15
l Consult your Lexus dealer.
16
l You may occasionally notice light knocking for a short time while accelerating or driving uphill. This is normal and there is no need for concern.
16
l Automotive manufacturers in the US, Europe and Japan have developed a specification for fuel quality called World-Wide Fuel Charter (WWFC) that is expected to be applied worldwide.
17
l The WWFC consists of four categories that are based on required emission levels. In the US, category 4 has been adopted.
17
l Lexus recommends the use of gasoline that contains detergent additives to avoid build-up of engine deposits.
17
l All gasoline sold in the US contains detergent additives to clean and/or keep clean intake systems.
17
n Lexus recommends the use of cleaner burning gasoline
17
l Lexus allows the use of oxygenate blended gasoline where the oxygenate content is up to 10% ethanol or 15% MTBE.
17
l If you use gasohol in your Lexus, be sure that it has an octane rating no lower than 87.
17
l Lexus DOES NOT recommend the use of gasoline containing methanol.
17
n Lexus does not recommend gasoline containing MMT
17
Some gasoline contains octane enhancing additive called MMT (Methylcyclopentadienyl Manganese Tricarbonyl).
17
Lexus DOES NOT recommend the use of gasoline that contains MMT. If fuel containing MMT is used, your emission control system may be adversely affected.
17
l Do not use leaded gasoline. Leaded gasoline can cause damage to your vehicle’s three-way catalytic converters causing the emission control system to malfunction.
18
l Do not use gasohol other than that stated here. Other gasohol may cause fuel system damage or vehicle performance problems.
18
l IS250: Use of unleaded gasoline with an octane rating lower than 91 may result in engine knocking. Persistent knocking can lead to engine damage and should be corrected by refueling with higher octane unleaded gasoline.
18
Standard tire
19
Compact spare tire
19
Tire size (ÆP. 426)
19
DOT and Tire Identification Number (TIN) (ÆP. 426)
19
A tubeless tire does not have a tube and air is directly filled in the tire. A tube type tire has a tube inside the tire and the tube maintains the air pressure.
20
A compact spare tire is identified by the phrase “TEMPORARY USE ONLY” molded into its sidewall. This tire is designed for temporary emergency use only.
20
A tire marked C may have poor traction performance.
23
Sustained high temperature can cause the material of the tire to degenerate and reduce tire life, and excessive temperature can lead to sudden tire failure.
24
The grade C corresponds to a level of performance which all passenger car tires must meet under the Federal Motor Vehicle Safety Standard No. 109.
24
Grades B and A represent higher levels of performance on the laboratory test wheel than the minimum required by law.
24
The following item must be initialized for normal system operation in cases such as after the battery is reconnected, or maintenance is performed on the vehicle.
1
If you believe that your vehicle has a defect which could cause a crash or could cause injury or death, you should immediately i...
1
If NHTSA receives similar complaints, it may open an investigation, and if it finds that a safety defect exists in a group of ve...
1
See the seat belt section for more detailed seat belt instructions in English.
2
A
1
B
2
C
2
D
3
E
4
F
5
G
5
H
6
I
6
J
6
K
7
L
7
M
7
O
7
P
8
R
8
S
8
T
10
V
11
6791.bcxfc.p1.pdf
1
6791.ifcxibc.p1.pdf
2
6791.01.p1.pdf
3
6791.02.p1.pdf
4
6791.03.p1.pdf
5
6791.04.p1.pdf
6
6791.05.p1.pdf
7
6791.06.p1.pdf
8
6791.07.p1.pdf
9
6791.08.p1.pdf
10
6791.09.p1.pdf
11
6791.10.p1.pdf
12
6791.11.p1.pdf
13
6791.12.p1.pdf
14
6791.13.p1.pdf
15
6791.14.p1.pdf
16
6791.15.p1.pdf
17
6791.16.p1.pdf
18
6791.17.p1.pdf
19
6791.18.p1.pdf
20
6791.19.p1.pdf
21
6791.20.p1.pdf
22
6791.21.p1.pdf
23
6791.22.p1.pdf
24
6791.23.p1.pdf
25
6791.24.p1.pdf
26
6791.25.p1.pdf
27
6791.26.p1.pdf
28
6791.27.p1.pdf
29
6791.28.p1.pdf
30
6791.29.p1.pdf
31
6791.30.p1.pdf
32
6791.31.p1.pdf
33
6791.32.p1.pdf
34
6791.33.p1.pdf
35
6791.34.p1.pdf
36
6791.35.p1.pdf
37
6791.36.p1.pdf
38
6791.37.p1.pdf
39
6791.38.p1.pdf
40
6791.39.p1.pdf
41
6791.40.p1.pdf
42
6791.41.p1.pdf
43
6791.42.p1.pdf
44
6791.43.p1.pdf
45
6791.44.p1.pdf
46
6791.45.p1.pdf
47
6791.46.p1.pdf
48
6791.47.p1.pdf
49
6791.48.p1.pdf
50
6791.49.p1.pdf
51
6791.50.p1.pdf
52
6791.51.p1.pdf
53
6791.52.p1.pdf
54
6791.53.p1.pdf
55
6791.54.p1.pdf
56
6791.55.p1.pdf
57
6791.56.p1.pdf
58
6791.57.p1.pdf
59
6791.58.p1.pdf
60
6791.59.p1.pdf
61
6791.60.p1.pdf
62
6791.61.p1.pdf
63
6791.62.p1.pdf
64
6791.63.p1.pdf
65
6791.64.p1.pdf
66
6791.65.p1.pdf
67
6791.66.p1.pdf
68
6791.67.p1.pdf
69
6791.68.p1.pdf
70
6791.69.p1.pdf
71
6791.70.p1.pdf
72
6791.71.p1.pdf
73
6791.72.p1.pdf
74
6791.73.p1.pdf
75
6791.74.p1.pdf
76
6791.75.p1.pdf
77
6791.76.p1.pdf
78
6791.77.p1.pdf
79
6791.78.p1.pdf
80
6791.79.p1.pdf
81
6791.80.p1.pdf
82

FAQ about the 2008 Lexus Is250 Manual

What contains the 2008 Is250 manual?

The Lexus Is250 owner's manual is a comprehensive guide provided by Lexus to assist owners in understanding and operating their specific model of the Lexus Is250. It contains important information about the vehicle's features, functions, and maintenance requirements. A general overview of what you might find in a Lexus Is250 2008 owner's manual:

  • Warranty Information, about the vehicle's warranty coverage
  • Fuel Information, with recommended fuel type and fuel tank capacity
  • Handling the Unexpected, including tire changes, jump-starting, and common car issues
  • Best practice for driving your Lexus Is250
  • Instrument Panel and Controls, including dashboard indicators, warning lights, and controls

Where to download the 2008 Lexus Is250 Owners Manual?

The Lexus Is250 owner manual for the 2008 model year is to be found on this page.

Is the manual for the Lexus Is250 year 2008 free?

Yes, the owner manual for the model year 2008 is free, but the repair manuals are usually not easy to get and may cost more.

The Lexus Is250 (2008) owner's manual is available in English?

Yes, the owner's manual for the model year 2008 is available in English.

Posted by, John Mana author bio image
A passionate guy about car models, makes, and manuals.

Manual Questions

Do you have questions about the 2008 Lexus Is250 owners manual?
Fill the form below and someone will help you!