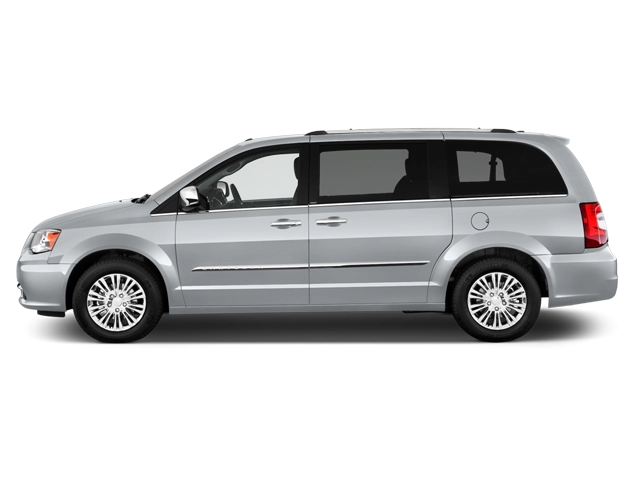
2015 Chrysler Town And Country Owner's Manual

2015 Chrysler Town And Country owners manual
Year:
2015
Make:
Chrysler
Model:
Town And Country
Rating:
(7)

Online manual

Size:
4.89 MB

Table of Contents

INTRODUCTION
5
INTRODUCTION
6
HOW TO USE THIS MANUAL
6
WARNINGS AND CAUTIONS
8
VEHICLE IDENTIFICATION NUMBER
8
VEHICLE MODIFICATIONS/ALTERATIONS
9
THINGS TO KNOW BEFORE STARTING YOUR VEHICLE
11
A WORD ABOUT YOUR KEYS
14
Wireless Ignition Node (WIN)
14
Key Fob
15
Removing Key Fob From Ignition
16
Key-In-Ignition Reminder
17
SENTRY KEY®
17
Replacement Keys
18
Customer Key Programming
19
General Information
19
VEHICLE SECURITY ALARM — IF EQUIPPED
19
Rearming Of The System
20
To Arm The System
20
To Disarm The System
20
Tamper Alert
22
Security System Manual Override
22
ILLUMINATED APPROACH
22
REMOTE KEYLESS ENTRY (RKE) — IF EQUIPPED
23
Using The RKE Transmitter
24
Remote Unlock Doors And Liftgate
25
Remote Key Unlock On First Press
25
Sound Horn With Remote Lock
26
Using The Panic Alarm
27
Power Open/Close Power Liftgate — If Equipped
27
Power Open/Close Left Power Sliding Door — If Equipped
28
Power Open/Close Right Power Sliding Door — If Equipped
28
Turn Off Flash Lights With RKE Lock — If Equipped
29
Programming Additional Transmitters
30
Transmitter Battery Replacement
30
General Information
32
REMOTE STARTING SYSTEM — IF EQUIPPED
32
How To Use Remote Start
33
Remote Start Abort Message On Electronic Vehicle Information Center (EVIC) — If Equipped
34
To Enter Remote Start Mode
34
To Enter The Vehicle After Remote Start
35
To Exit Remote Start Mode And Drive The Vehicle
35
Cancel Remote Start
36
To Turn Off The Engine While In Remote Start Mode
36
When To Reset Remote Start
37
DOOR LOCKS
37
Manual Door Locks
37
Power Door Locks — If Equipped
39
Automatic Door Locks — If Equipped
40
Unlock Doors Automatically On Exit — If Equipped
40
KEYLESS ENTER-N-GO™
41
WINDOWS
46
Power Vent Windows — If Equipped
46
Power Windows
46
Power Window Lockout Switch — If Equipped
47
Front Passenger Power Window Switch
47
Auto-Down Feature — If Equipped
48
Auto Up Feature With Anti-Pinch Protection — If Equipped
49
Auto Up Reset — If Equipped
49
Sliding Side Door Power Window Switch — If Equipped
50
Wind Buffeting
50
SLIDING SIDE DOOR
51
Power Sliding Side Door — If Equipped
52
Power Sliding Side Door Open Flash
54
Power Sliding Side Door Power Switch
55
Sliding Side Door Child Protection Lock
56
To Engage The Child Protection Door Lock
56
To Disengage The Child Protection Door Lock
57
LIFTGATE
58
Power Liftgate — If Equipped
59
OCCUPANT RESTRAINT SYSTEMS
63
Important Safety Precautions
63
Seat Belt Systems
64
Driver And Passenger BeltAlert (If Equipped)
65
Lap/Shoulder Belts
66
Lap/Shoulder Belt Operating Instructions
69
Third Row Center Belt Operating Instructions
71
Lap/Shoulder Belt Untwisting Procedure
75
Adjustable Upper Shoulder Belt Anchorage
76
Seat Belt Extender
76
Seat Belts And Pregnant Women
77
Seat Belt Pretensioner
77
Energy Management Feature
78
Automatic Locking Retractor (ALR) — If Equipped
78
How To Engage The Automatic Locking Mode
80
How To Disengage The Automatic Locking Mode
81
Supplemental Active Head Restraints (AHR)
81
Resetting Active Head Restraints (AHR)
83
Supplemental Restraint System (SRS)
85
Air Bag System Components
85
Advanced Front Air Bags
86
Advanced Front Air Bag Features
87
Advanced Front Air Bag Operation
88
Knee Impact Bolsters
89
Supplemental Driver Knee Air Bag
90
Supplemental Side Air Bags
90
If A Deployment Occurs
95
Enhanced Accident Response System
96
System Reset Procedure
97
Air Bag Warning Light
97
Maintaining Your Air Bag System
99
Event Data Recorder (EDR)
99
Child Restraints
100
Summary Of Recommendations For Restraining Children In Vehicles
102
Infants And Child Restraints
103
Older Children And Child Restraints
104
Children Too Large For Booster Seats
105
Recommendations For Attaching Child Restraints
107
Lower Anchors And Tethers For Children (LATCH) Restraint System
108
LATCH Positions For Installing Child Restraints In This Vehicle
109
Locating LATCH Anchorages
112
Locating Tether Anchorages
113
Center Seat LATCH
114
To Install A LATCH-Compatible Child Restraint
114
How To Stow An Unused ALR Seat Belt:
115
Installing Child Restraints Using The Vehicle Seat Belt
116
Lap/Shoulder Belt Systems For Installing Child Restraints In This Vehicle
117
Installing A Child Restraint With A Switchable Automatic Locking Retractor (ALR)
119
Installing A Child Restraint With A Cinching Latch Plate (CINCH) — If Equipped
120
Installing Child Restraints Using The Top Tether Anchorage:
122
Transporting Pets
124
ENGINE BREAK-IN RECOMMENDATIONS
125
SAFETY TIPS
126
Transporting Passengers
126
Exhaust Gas
126
Safety Checks You Should Make Inside The Vehicle
127
Seat Belts
127
Air Bag Warning Light
128
Defroster
128
Floor Mat Safety Information
128
Periodic Safety Checks You Should Make Outside The Vehicle
129
Tires
129
Lights
130
Door Latches
130
Fluid Leaks
130
UNDERSTANDING THE FEATURES OF YOUR VEHICLE
131
MIRRORS
138
Inside Day/Night Mirror — If Equipped
138
Automatic Dimming Mirror — If Equipped
139
Outside Mirrors
140
Driver's Outside Automatic Dimming Mirror — If Equipped
140
Outside Mirrors Folding Feature
140
Power Mirrors — If Equipped
141
Heated Mirrors — If Equipped
142
Tilt Mirrors In Reverse (Available With Memory Seat Only) — If Equipped
142
Power Folding Mirrors — If Equipped
142
Illuminated Vanity Mirrors — If Equipped
144
BLIND SPOT MONITORING (BSM) — IF EQUIPPED
144
Rear Cross Path (RCP)
150
Modes Of Operation
151
General Information
152
Uconnect® PHONE — IF EQUIPPED
153
Operation
155
Voice Command Tree
156
Help Command
156
Cancel Command
156
Pair (Link) Uconnect® Phone To A Mobile Phone
156
Dial By Saying A Number
157
Call By Saying A Name
158
Phonebook Download — Automatic Phonebook Transfer From Mobile Phone
158
Add Names To Your Uconnect® Phonebook
159
Edit Uconnect® Phonebook Entries
160
Delete Uconnect® Phonebook Entry
161
Delete/Erase “All” Uconnect® Phonebook Entries
161
List All Names In The Uconnect® Phonebook
162
Phone Call Features
162
Answer Or Reject An Incoming Call — No Call Currently In Progress
163
Answer Or Reject An Incoming Call — Call Currently In Progress
163
Making A Second Call While Current Call Is In Progress
163
Place/Retrieve A Call From Hold
164
Toggling Between Calls
164
Conference Call
164
Three-Way Calling
164
Call Termination
165
Redial
165
Call Continuation
165
Uconnect® Phone Features
166
Language Selection
166
Emergency Assistance
166
Roadside Assistance/Towing Assistance
167
Paging
168
Voice Mail Calling
168
Working With Automated Systems
168
Barge In — Overriding Prompts
169
Turning Confirmation Prompts ON/OFF
169
Phone And Network Status Indicators
169
Dialing Using The Mobile Phone Keypad
170
Mute/Un-Mute (Mute ON/OFF)
170
Advanced Phone Connectivity
171
Transfer Call To And From Mobile Phone
171
Connect Or Disconnect Link Between The Uconnect® Phone And Mobile Phone
171
List Paired Mobile Phone Names
171
Select Another Mobile Phone
172
Delete Uconnect® Phone Paired Mobile Phones
172
Things You Should Know About Your Uconnect® Phone
172
Uconnect® Phone Tutorial
172
Voice Training
173
Reset
173
Voice Command
174
Far End Audio Performance
175
Recent Calls
175
Voice Text Reply
175
Bluetooth® Communication Link
178
Power-Up
178
General Information
184
VOICE COMMAND — IF EQUIPPED
184
Voice Command System Operation
184
Commands
186
Changing The Volume
186
Main Menu
186
Radio AM
187
Radio FM
187
Satellite Radio
187
Disc Mode
188
USB Mode
188
Bluetooth® Streaming (BT) Mode
188
Memo Mode
189
Setup
189
Voice Training
190
SEATS
190
Power Seats — If Equipped
191
Adjusting The Seat Forward Or Rearward
192
Adjusting The Seat Up Or Down
192
Tilting The Seat Up Or Down
193
Reclining The Seatback
193
Power Lumbar — If Equipped
194
Heated Seats — If Equipped
195
Vehicles Equipped With Remote Start
195
Front Heated Seats
196
Rear Heated Seats
196
Manual Front/Second Row Seat Adjuster
198
Manual Reclining Seats — If Equipped
199
Head Restraints
200
Active Head Restraints — Front Seats
201
Head Restraints — Second Row Quad Seats
204
Head Restraints — Second Row Bench
204
Head Restraints — Third Row
204
Stow 'n Go® Seating — If Equipped
204
Second Row Stow 'n Go®
205
To Unstow Second Row Seats
209
Stow 'n Go® Seat — Folded And Latched Position
210
Easy Entry Second Row
211
Quad Seats — If Equipped
212
Manual Recline
213
Fold-Flat
214
Easy Entry
214
Removal
215
Second Row Bench Seat — If Equipped
216
Third Row Power Recline — If Equipped
217
Third Row Power Folding Seat — If Equipped
217
Manually Folding Third Row Seats — If Equipped
220
To Unfold Third Row Seats
222
Tailgate Mode
223
Plastic Grocery Bag Retainer Hooks
223
DRIVER MEMORY SEAT — IF EQUIPPED
223
Programming The Memory Feature
224
Linking And Unlinking The Remote Keyless Entry Transmitter To Memory
225
Memory Position Recall
226
Easy Entry/Exit Seat (Available With Memory Seat Only)
226
TO OPEN AND CLOSE THE HOOD
228
LIGHTS
230
Headlight Switch
230
Automatic Headlights — If Equipped
231
Headlights On With Wipers — If Equipped
231
Headlight Delay — If Equipped
231
Lights-On Reminder
232
Daytime Running Lights — If Equipped
232
Front Fog Lights — If Equipped
233
Dimmer Controls
233
Interior Lighting On
234
Interior Lighting Off
234
Parade Mode (Daytime Brightness Feature)
234
Halo Lights — If Equipped
235
Multifunction Lever
236
Turn Signals
236
Turn Signal Warning
237
Lane Change Assist
237
High/Low Beam Switch
237
Flash-To-Pass
237
Automatic High Beam — If Equipped
237
To Activate
238
To Deactivate
239
Battery Protection
239
WINDSHIELD WIPER AND WASHERS
240
Intermittent Wiper System
241
Windshield Wiper Operation
241
Windshield Washers
241
Mist Feature
241
Rear Wiper And Washer
242
Rain Sensing Wipers — If Equipped
242
TILT/TELESCOPING STEERING COLUMN
244
HEATED STEERING WHEEL — IF EQUIPPED
245
ADJUSTABLE PEDALS — IF EQUIPPED
246
ELECTRONIC SPEED CONTROL — IF EQUIPPED
248
To Activate
249
To Set A Desired Speed
249
To Deactivate
250
To Resume Speed
250
To Vary The Speed Setting
250
To Accelerate For Passing
251
Using Electronic Speed Control On Hills
251
PARKSENSE® REAR PARK ASSIST — IF EQUIPPED
252
ParkSense® Sensors
253
ParkSense® Warning Display
253
ParkSense® Display
254
Enabling/Disabling ParkSense®
257
Service The ParkSense® Rear Park Assist System
258
Cleaning The ParkSense® System
258
ParkSense® System Usage Precautions
258
PARKVIEW® REAR BACK UP CAMERA — IF EQUIPPED
261
OVERHEAD CONSOLES
263
Front Overhead Console
263
Courtesy/Interior Lighting
264
Sunglass Storage (Non-Sunroof Only)
264
Rear Courtesy/Reading Lights — If Equipped
266
Rear Overhead Consoles — If Equipped
267
Rear Console Halo Lighting
268
GARAGE DOOR OPENER — IF EQUIPPED
268
Before You Begin Programming HomeLink®
269
Programming A Rolling Code
270
Reprogramming A Single HomeLink® Button (Rolling Code)
272
Programming A Non-Rolling Code
272
Reprogramming A Single HomeLink® Button (Non-Rolling Code)
273
Canadian/Gate Operator Programming
273
Reprogramming A Single HomeLink® Button (Canadian/Gate Operator)
274
Using HomeLink®
275
Security
275
Troubleshooting Tips
275
General Information
276
POWER SUNROOF — IF EQUIPPED
277
Opening Sunroof — Express
278
Opening Sunroof — Manual Mode
278
Closing Sunroof — Express
278
Closing Sunroof — Manual Mode
278
Pinch Protect Feature
279
Venting Sunroof — Express
279
Sunshade Operation
279
Wind Buffeting
279
Sunroof Maintenance
280
Ignition Off Operation
280
ELECTRICAL POWER OUTLETS — IF EQUIPPED
280
POWER INVERTER — IF EQUIPPED
285
CUPHOLDERS
286
Instrument Panel Cupholders
287
Super Console — If Equipped
287
Premium Console Cupholders — If Equipped
288
Interior Bottle Holders
289
Smoker's Package Kit — If Equipped
290
STORAGE
290
Glove Compartments
290
Upper Glove Compartment
290
Lower Glove Compartment
291
Door Trim Panel Storage
291
Front Door Storage
291
Driver Seatback Storage — If Equipped
292
Umbrella Holder
293
Second Row Floor Storage Bins
293
Storage Bin Safety Warning
294
Seat Storage Bin Cover Emergency Release Lever
296
Center And Rear Overhead Console Storage — If Equipped
296
Coat Hooks
297
Cargo Area Storage
298
CONSOLE FEATURES
298
Basic Console
299
To Remove The Basic Floor Console
299
To Reinstall The Basic Floor Console
299
Premium Console — If Equipped
300
Dual Storage Bins
302
To Remove The Premium Floor Console
303
Super Console — If Equipped
303
REAR WINDOW FEATURES
305
Rear Window Defroster
305
LOAD LEVELING SYSTEM — IF EQUIPPED
306
ROOF LUGGAGE RACK — IF EQUIPPED
306
Deploying The Crossbars
307
Stowing The Crossbars
310
SUN SCREENS — IF EQUIPPED
312
UNDERSTANDING YOUR INSTRUMENT PANEL
315
INSTRUMENT PANEL FEATURES
320
INSTRUMENT CLUSTER — BASE
321
INSTRUMENT CLUSTER — PREMIUM
322
INSTRUMENT CLUSTER DESCRIPTIONS
323
ELECTRONIC VEHICLE INFORMATION CENTER (EVIC) — IF EQUIPPED
337
Electronic Vehicle Information Center (EVIC) Displays
339
EVIC White Telltale Lights
343
EVIC Amber Telltale Lights
343
EVIC Red Telltale Lights
344
Oil Change Required
347
Fuel Economy
348
Average Fuel Economy
348
Distance To Empty (DTE)
349
Current Fuel Economy (MPG or L/100 km)
349
Vehicle Speed
349
Trip Info
350
Trip A
350
Trip B
350
Elapsed Time
350
To Reset A Trip Function
350
Tire Pressure
350
Units
351
Vehicle Info (Customer Information Features)
351
Compass / Temperature Display
352
Automatic Compass Calibration
352
Manual Compass Calibration
352
Compass Variance
353
Keyless Enter-N-Go™ Display — If Equipped
354
Turn Menu Off
355
Customer-Programmable Features (System Setup)
355
Language
355
Nav–Turn By Turn
355
Enable/Disable The Rear Park Assist System — If Equipped
356
Auto Lock Doors
356
Auto Unlock Doors
356
Remote Unlock Sequence
356
RKE Linked To Memory- If Equipped
357
Remote Start Comfort Sys.
357
Horn With Remote Lock
357
Flash Lamps With Lock
358
Automatic High Beams — If Equipped
358
Headlamp Off Delay
358
Headlamps With Wipers (Available With Auto Headlights Only)
358
Intermittent Wiper Options — If Equipped
359
Key-Off Power Delay
359
Illuminated Approach
359
Hill Start Assist (HSA) — If Equipped
359
Flashers With Sliding Door
360
Keyless Enter-N-Go™ (Passive Entry) — If Equipped
360
Easy Exit Seat
360
Tilt Mirror In Reverse — If Equipped
361
Blind Spot Alert — If Equipped
361
Calibrate Compass
362
Compass Variance
362
Uconnect® 730N/430/430N CD/DVD/HDD/NAV — IF EQUIPPED
362
Operating Instructions (Voice Command System) — If Equipped
362
Operating Instructions (Uconnect® Phone) — If Equipped
362
Uconnect® 130
363
Operating Instructions — Radio Mode
363
Power Switch/Volume Control (Rotary)
363
Electronic Volume Control
363
SEEK Buttons
363
TIME Button
364
Clock Setting Procedure
364
RW/FF
364
TUNE Control
364
Setting The Tone, Balance And Fade
364
AM/FM Button
365
SET/RND Button — To Set The Pushbutton Memory
365
Buttons 1 - 6
366
DISC Button
366
Operation Instructions — CD MODE For CD And MP3 Audio Play
366
Inserting Compact Disc(s)
366
EJECT Button — Ejecting A CD
367
SEEK Button
368
TIME Button
368
RW/FF
368
AM/FM Button
368
SET/RND Button (Random Play Button)
368
Notes On Playing MP3 Files
368
Supported Media (Disc Types)
369
Supported Medium Formats (File Systems)
369
Supported MP3 File Formats
370
Playback Of MP3 Files
371
Operation Instructions — Auxiliary Mode
371
TIME Button (Auxiliary Mode)
372
Uconnect® 130 WITH SATELLITE RADIO
372
Operating Instructions — Radio Mode
372
Power Switch/Volume Control (Rotary)
372
Electronic Volume Control
372
SEEK Buttons
373
Voice Command System (Radio) — If Equipped
373
Voice Command Button Uconnect® Phone — If Equipped
373
Phone Button Uconnect® Phone — If Equipped
373
TIME Button
373
Clock Setting Procedure
374
INFO Button
374
RW/FF
374
TUNE Control
374
Setting The Tone, Balance And Fade
375
MUSIC TYPE Button
375
SETUP Button
377
AM/FM Button
377
SET/RND Button — To Set The Pushbutton Memory
377
Buttons 1 - 6
378
DISC/AUX Button
378
Operation Instructions — CD MODE For CD And MP3 Audio Play
378
Inserting Compact Disc(s)
378
EJECT Button — Ejecting A CD
379
SEEK Button
379
TIME Button
380
RW/FF
380
AM/FM Button
380
SET/RND Button (Random Play Button)
380
Notes On Playing MP3 Files
380
Supported Media (Disc Types)
381
Supported Medium Formats (File Systems)
381
Supported MP3 File Formats
382
Playback Of MP3 Files
383
LIST Button — CD Mode For MP3 Play
383
INFO Button — CD Mode For MP3 Play
383
Operation Instructions — Auxiliary Mode
384
TIME Button (Auxiliary Mode)
384
Uconnect® (Satellite Radio) — If Equipped
384
System Activation
385
Electronic Serial Number/Sirius Identification Number (ESN/SID)
385
ESN/SID Access
385
Selecting Uconnect® (Satellite) Mode
385
Satellite Antenna
385
Reception Quality
386
Operating Instructions — Uconnect® (Satellite) Mode
386
SEEK Buttons
386
SCAN Button
386
INFO Button
387
RW/FF
387
TUNE Control (Rotary)
387
MUSIC TYPE Button
387
SETUP Button
388
SET Button — To Set The Pushbutton Memory
388
Buttons 1 - 6
388
Operating Instructions (Uconnect® Phone) — If Equipped
388
SETTING THE ANALOG CLOCK
389
iPod®/USB/MP3 CONTROL — IF EQUIPPED
389
Connecting The iPod® Or External USB Device
390
Using This Feature
391
Controlling The iPod® Or External USB Device Using Radio Buttons
391
Play Mode
391
List Or Browse Mode
393
Bluetooth® Streaming Audio (BTSA)
395
Controlling BTSA Using Radio Buttons
395
Play Mode
395
Selecting A Different Audio Device
396
Next Track
396
Previous Track
396
Browse
396
Uconnect® MULTIMEDIA — VIDEO ENTERTAINMENT SYSTEM (VES™) — IF EQUIPPED
396
Getting Started
397
Blu-ray™ Disc Player
398
Play A Blu-ray™ Disc
398
Play Video Games
399
Using The Remote Control
400
Using The Touchscreen Radio Controls
400
Listen To An Audio Source On Channel 2 While A Video Is Playing On Channel 1
401
Using The Remote Control
402
Using The Touchscreen Radio Controls
402
Dual Video Screen
404
Play A DVD Using The Touchscreen Radio
404
Using The Remote Control
404
Using The Touchscreen Radio Controls
405
Play A DVD Using The VES™ Player — If Equipped
407
Using The Remote Control
407
Using The Touchscreen Radio Controls
408
Play A Blu-ray™ Disc Using The Blu-ray™ Player — If Equipped
409
Using The Remote Control
410
Using The Touchscreen Radio Controls
410
Listen To An Audio Source While A Video Is Playing
411
Using The Remote Control
411
Using The Touchscreen Radio Controls
412
Important Notes For Dual Video Screen System
413
VES™ Remote Control — If Equipped
414
Controls And Indicators
415
Blu-ray™ Player Remote Control — If Equipped
417
Controls And Indicators
417
Remote Control Storage
419
Locking The Remote Control
420
Replacing The Remote Control Batteries
420
Headphones Operation
420
Blu-ray™ Headphones Operation
421
Controls
422
Replacing The Headphone Batteries
423
Unwired® Stereo Headphone Lifetime Limited Warranty
424
System Information
425
Shared Modes
425
Information Mode Display
426
Numeric Keypad Menu
427
Station List Menu
427
Disc Menu
428
Display Settings
429
Listening To Audio With The Screen Closed
429
Disc Formats
430
Display
435
Product Agreement
440
STEERING WHEEL AUDIO CONTROLS — IF EQUIPPED
443
Radio Operation
444
CD Player
444
CD/DVD/Blu-ray™ Disc MAINTENANCE
445
RADIO OPERATION AND MOBILE PHONES
445
General Information
446
CLIMATE CONTROLS
446
Manual Heating And Air Conditioning System — If Equipped
446
Economy Mode
451
Max A/C
451
Rear Manual Climate Control — If Equipped
451
Rear Blower Control
452
Rear Temperature Control
453
Rear Mode Control
453
Automatic Temperature Control (ATC) — If Equipped
453
Air Conditioning (A/C)
457
Recirculation
458
Automatic Temperature Control (ATC)
458
Manual Operation Override
459
Controlling The Rear Climate Controls From The Front ATC Panel
460
Rear Mode Control
461
Rear Automatic Temperature Control (ATC) — If Equipped
461
Rear Blower Control
463
Rear Temperature Control
464
Rear Mode Control
464
Operating Tips
465
Summer Operation
465
Winter Operation
465
Vacation/Storage
466
Window Fogging
466
Outside Air Intake
466
A/C Air Filter
466
Operating Tips Chart
467
STARTING AND OPERATING
469
STARTING PROCEDURES
473
Automatic Transmission
474
Using Fob With Integrated Key (Tip Start)
474
Keyless Enter-N-Go™ — If Equipped
475
Installing And Removing The ENGINE START/STOP Button
475
Normal Starting
475
Using The ENGINE START/STOP Button
475
To Turn Off The Engine Using ENGINE START/STOP Button
476
Keyless Enter-N-Go™ Functions — With Driver’s Foot OFF The Brake Pedal/Clutch Pedal (In PARK Or NEUTRAL Position)
477
Extreme Cold Weather (Below –20°F or −29°C)
477
If Engine Fails To Start
477
Clearing A Flooded Engine (Using ENGINE START/STOP Button)
478
Clearing A Flooded Engine (Using Fob With Integrated Key)
479
After Starting
479
ENGINE BLOCK HEATER — IF EQUIPPED
479
AUTOMATIC TRANSMISSION
480
Key Ignition Park Interlock
482
Brake/Transmission Shift Interlock System
482
Fuel Economy (ECON) Mode
483
Six-Speed Automatic Transmission
484
Gear Ranges
485
DRIVING ON SLIPPERY SURFACES
493
Acceleration
493
Traction
493
DRIVING THROUGH WATER
494
Flowing/Rising Water
494
Shallow Standing Water
494
POWER STEERING
496
Power Steering Fluid Check
497
PARKING BRAKE
498
BRAKE SYSTEM
500
ELECTRONIC BRAKE CONTROL SYSTEM
501
Anti-Lock Brake System (ABS)
501
Anti-Lock Brake Warning Light
503
Traction Control System (TCS)
503
Brake Assist System (BAS)
504
Electronic Stability Control (ESC)
505
ESC Operating Modes
506
ESC Activation/Malfunction Indicator Light And ESC OFF Indicator Light
508
Trailer Sway Control (TSC)
509
Hill Start Assist (HSA)
509
HSA Activation Criteria
510
Disabling/Enabling HSA
510
Towing With HSA
511
HSA Off
512
TIRE SAFETY INFORMATION
513
Tire Markings
513
Tire Sizing Chart
514
Tire Identification Number (TIN)
516
Tire Terminology And Definitions
518
Tire Loading And Tire Pressure
519
Tire And Loading Information Placard Location
519
Tire And Loading Information Placard
520
Loading
521
TIRES — GENERAL INFORMATION
524
Tire Pressure
524
Safety
524
Fuel Economy
525
Tread Wear
525
Ride Comfort And Vehicle Stability
525
Tire Inflation Pressures
525
Tire Pressures For High Speed Operation
527
Radial Ply Tires
527
Tire Types
528
All Season Tires — If Equipped
528
Summer Or Three Season Tires — If Equipped
528
Snow Tires
529
Run Flat Tires — If Equipped
530
Spare Tires — If Equipped
530
Spare Tire Matching Original Equipped Tire And Wheel — If Equipped
530
Compact Spare Tire — If Equipped
531
Full Size Spare — If Equipped
532
Limited-Use Spare — If Equipped
532
Tire Spinning
533
Tread Wear Indicators
533
Life Of Tire
534
Replacement Tires
534
TIRE CHAINS (TRACTION DEVICES)
536
TIRE ROTATION RECOMMENDATIONS
537
TIRE PRESSURE MONITOR SYSTEM (TPMS)
538
Base System
541
Tire Pressure Monitoring Low Tire Pressure Warnings
542
Premium System — If Equipped
544
TPMS Low Pressure Warnings
544
SERVICE TPM SYSTEM Message
545
General Information
547
FUEL REQUIREMENTS
547
3.6L Engine
547
Reformulated Gasoline
548
Gasoline/Oxygenate Blends
548
E-85 Usage In Non-Flex Fuel Vehicles
549
MMT In Gasoline
549
Materials Added To Fuel
550
Fuel System Cautions
550
Carbon Monoxide Warnings
551
FLEXIBLE FUEL — IF EQUIPPED
552
E-85 General Information
552
Ethanol Fuel (E-85)
552
Fuel Requirements
553
Selection Of Engine Oil For Flexible Fuel Vehicles (E-85) And Gasoline Vehicles
553
Starting
554
Cruising Range
554
Replacement Parts
554
Maintenance
555
ADDING FUEL
555
Fuel Filler Cap (Gas Cap)
555
Loose Fuel Filler Cap Message
557
VEHICLE LOADING
557
Vehicle Certification Label
557
Gross Vehicle Weight Rating (GVWR)
558
Gross Axle Weight Rating (GAWR)
558
Tire Size
558
Rim Size
558
Inflation Pressure
559
Curb Weight
559
Overloading
559
Loading
559
TRAILER TOWING
560
Common Towing Definitions
560
Gross Vehicle Weight Rating (GVWR)
560
Gross Trailer Weight (GTW)
560
Gross Axle Weight Rating (GAWR)
561
Tongue Weight (TW)
561
Frontal Area
561
Trailer Sway Control
561
Weight-Carrying Hitch
562
Weight-Distributing Hitch
562
Trailer Hitch Classification
563
Trailer Towing Weights (Maximum Trailer Weight Ratings)
564
Trailer And Tongue Weight
565
Towing Requirements
566
Towing Requirements — Tires
568
Towing Requirements — Trailer Brakes
568
Towing Requirements — Trailer Lights And Wiring
569
Towing Tips
571
Automatic Transmission
571
Electronic Speed Control — If Equipped
571
Cooling System
571
RECREATIONAL TOWING (BEHIND MOTORHOME, ETC.)
572
Towing This Vehicle Behind Another Vehicle
572
Recreational Towing — All Models
573
WHAT TO DO IN EMERGENCIES
575
HAZARD WARNING FLASHERS
577
IF YOUR ENGINE OVERHEATS
577
TIRE SERVICE KIT — IF EQUIPPED
578
Tire Service Kit Storage
578
Tire Service Kit Components And Operation
580
Using The Mode Select Knob And Hoses
580
Tire Service Kit Usage Precautions
581
Sealing A Tire With Tire Service Kit
583
(A) Whenever You Stop To Use Tire Service Kit:
583
(B) Setting Up To Use Tire Service Kit:
584
(C) Injecting Tire Service Kit Sealant Into The Deflated Tire:
584
(D) Drive Vehicle:
587
(E) After Driving:
587
(F) Sealant Bottle And Hose Replacement:
588
WHEEL AND TIRE TORQUE SPECIFICATIONS
589
Torque Specifications
589
JACKING AND TIRE CHANGING — IF EQUIPPED
591
Jack Location
592
Spare Tire Removal
592
To Access Spare Tire Winch Drive Nut
593
Super Console
593
Premium/Base/Cargo Center Console
595
Spare Tire Tools
595
Spare Tire Removal Instructions
597
Preparations For Jacking
599
Jacking Instructions
599
Securing The Compact Spare Tire
606
Road Tire Installation
608
Vehicles Equipped With Wheel Covers
608
Vehicles Without Wheel Covers
610
JUMP-STARTING
610
Preparations For Jump-Start
611
Jump-Starting Procedure
612
FREEING A STUCK VEHICLE
614
SHIFT LEVER OVERRIDE
615
TOWING A DISABLED VEHICLE
617
MAINTAINING YOUR VEHICLE
621
ENGINE COMPARTMENT — 3.6L
623
ONBOARD DIAGNOSTIC SYSTEM — OBD II
624
Loose Fuel Filler Cap Message
624
EMISSIONS INSPECTION AND MAINTENANCE PROGRAMS
625
REPLACEMENT PARTS
627
DEALER SERVICE
627
MAINTENANCE PROCEDURES
627
Engine Oil
628
Checking Oil Level
628
Change Engine Oil
629
Engine Oil Selection
629
American Petroleum Institute (API) Engine Oil Identification Symbol
629
Engine Oil Viscosity — 3.6L Engine
630
Synthetic Engine Oils
630
Materials Added To Engine Oil
630
Disposing Of Used Engine Oil And Oil Filters
631
Engine Oil Filter
631
Engine Oil Filter Selection
631
Engine Air Cleaner Filter
631
Engine Air Cleaner Filter Selection
632
Exhaust System
632
Maintenance-Free Battery
634
Air Conditioner Maintenance
635
Refrigerant Recovery And Recycling
636
A/C Air Filter
636
Body Lubrication
637
Windshield Wiper Blades
638
Adding Washer Fluid
638
Cooling System
639
Coolant Checks
640
Cooling System — Drain, Flush And Refill
640
Selection Of Coolant
641
Adding Coolant
641
Cooling System Pressure Cap
643
Disposal Of Used Engine Coolant
643
Coolant Level
644
Points To Remember
644
Brake System
645
Master Cylinder — Brake Fluid Level Check
646
Automatic Transmission
647
Selection Of Lubricant
647
Special Additives
648
Fluid Level Check
648
Fluid And Filter Changes
649
Appearance Care And Protection From Corrosion
649
Protection Of Body And Paint From Corrosion
649
What Causes Corrosion?
650
Washing
650
Special Care
651
Wheel And Wheel Trim Care
651
Stain Repel Fabric Cleaning Procedure — If Equipped
652
Interior Care
652
Cleaning Headlights
653
Glass Surfaces
654
Cleaning Plastic Instrument Cluster Lenses
654
Seat Belt Maintenance
654
Cleaning The Instrument Panel Cupholders
655
Removal
655
Cleaning
655
Installation
656
FUSES
656
Totally Integrated Power Module (Fuses)
656
VEHICLE STORAGE
664
REPLACEMENT BULBS
664
BULB REPLACEMENT
666
High Intensity Discharge Headlamps (HID) — If Equipped
666
Quad Headlamps
667
Front Park/Turn Signal Lamps
667
Front Side Marker Lamp
668
Front Fog Lamp
668
Rear Turn Signal And Backup Lamp
669
Center High-Mounted Stop Lamp (CHMSL)
670
License Lamp
670
FLUID CAPACITIES
671
FLUIDS, LUBRICANTS AND GENUINE PARTS
672
Engine
672
Chassis
674
MAINTENANCE SCHEDULES
675
MAINTENANCE SCHEDULE
676
Maintenance Chart
678
IF YOU NEED CONSUMER ASSISTANCE
683
SUGGESTIONS FOR OBTAINING SERVICE FOR YOUR VEHICLE
685
Prepare For The Appointment
685
Prepare A List
685
Be Reasonable With Requests
685
IF YOU NEED ASSISTANCE
685
FCA US LLC Customer Center
686
FCA Canada Inc. Customer Center
686
In Mexico Contact
687
Customer Assistance For The Hearing Or Speech Impaired (TDD/TTY)
687
Service Contract
687
WARRANTY INFORMATION
688
MOPAR® PARTS
689
REPORTING SAFETY DEFECTS
689
In The 50 United States And Washington, D.C.
689
In Canada
689
PUBLICATION ORDER FORMS
690
DEPARTMENT OF TRANSPORTATION UNIFORM TIRE QUALITY GRADES
691
Treadwear
691
Traction Grades
691
Temperature Grades
692
INDEX
693

2015 Chrysler Town And Country Overview

Introduction

The 2015 Chrysler Town and Country is a versatile and family-friendly minivan that strikes a perfect balance between comfort, function, and sophistication. With its stylish exterior and spacious interior, this vehicle offers the ideal solution for families on the go. Equipped with innovative features and numerous amenities, the Town and Country stands out as a top choice in the crowded minivan market.

Powertrains

Under the hood, the 2015 Town and Country boasts a robust 3.6-liter V6 engine that delivers 283 horsepower and 260 lb-ft of torque. This powerful engine provides ample power for highway cruising or navigating hilly terrain while maintaining a smooth ride. It is paired with a six-speed automatic transmission, which enhances fuel efficiency, allowing the minivan to achieve up to an EPA-estimated 17 MPG in the city and 25 MPG on the highway.

Trims

The 2015 Chrysler Town and Country comes in five distinct trims: Touring, Touring-L, Limited, S, and the top-tier Limited Platinum, allowing buyers to choose according to their needs and preferences. Each trim level adds its own level of luxury and convenience, with the Limited Platinum offering premium leather seats, advanced technology, and additional safety features.

Features

This minivan is packed with family-friendly features, including the innovative Stow 'n Go seating system, which allows for easy transformation of cargo space. Standard features include a touchscreen infotainment system, Bluetooth connectivity, rearview camera, and tri-zone automatic climate control. Higher trims incorporate premium audio systems, navigation, and rear-seat entertainment systems, ensuring that every journey is enjoyable for both drivers and passengers.

Owners Manual

The 2015 Chrysler Town and Country owner's manual is a comprehensive guide for new owners, detailing essential information about vehicle operation, maintenance schedules, and troubleshooting tips. It helps owners maximize their minivan experience, ensuring safety and longevity of the vehicle while outlining the features and capabilities available at their fingertips.

User manual download

The Chrysler Town And Country owner manual for the 2015 model year is to be found in PDF downloadable format on this page. The owner manual for the model year 2015 is free and in English, but the repair manuals are usually not easy to get and may cost more.

Posted by, John Mana author bio image
A passionate guy about car models, makes, and manuals.

Manual Questions

Do you have questions about the 2015 Chrysler Town And Country owners manual?
Fill the form below and someone will help you!