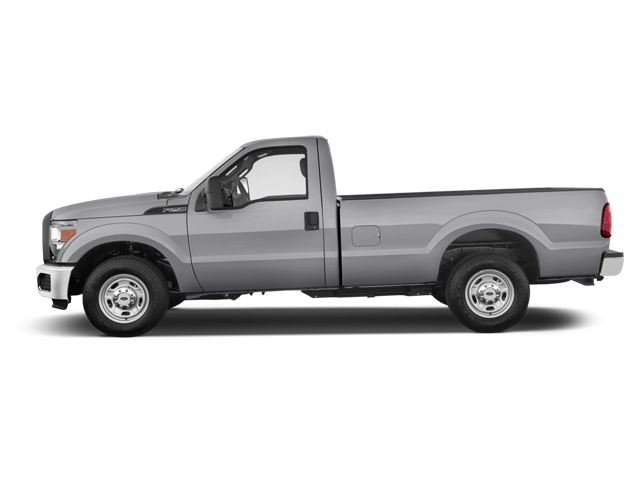
2009 Ford F250 Owner's Manual
2009 Ford F250 owners manual
Year:
2009
Make:
Ford
Model:
F250
Rating:
(5)

Online manual

Size:
3.58 MB

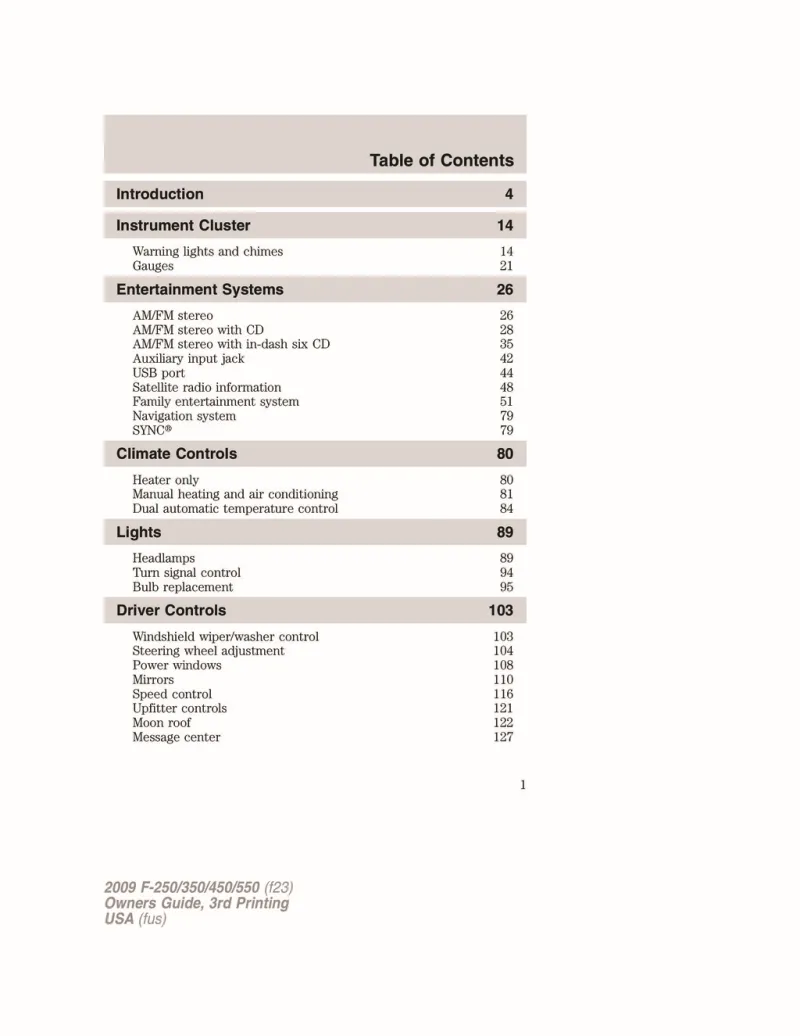
Table of Contents

Table of Contents
1
Introduction
4
CONGRATULATIONS
4
SAFETY AND ENVIRONMENT PROTECTION
5
Warning symbols in this guide
5
Warning symbols on your vehicle
5
Protecting the environment
5
PERCHLORATE MATERIAL
6
BREAKING-IN YOUR VEHICLE
6
SPECIAL NOTICES
6
New Vehicle Limited Warranty
6
Service Data Recording
7
Event Data Recording
7
Vehicle Modification Data Recording
8
Special instructions
9
Cell phone use
9
Notice to owners of diesel-powered vehicles
9
Notice to owners of pickup trucks and utility type vehicles
10
Using your vehicle with a snowplow
10
Using your vehicle as an ambulance
10
Using your vehicle as a stationary power source (PTO)
11
Export unique (Non–United States/Canada) vehicle specific information
11
Instrument Cluster
14
WARNING LIGHTS AND CHIMES
14
GAUGES
21
Entertainment Systems
26
AUDIO SYSTEMS
26
AM/FM stereo system (if equipped)
26
AM/FM stereo single CD/satellite compatible sound system (if equipped)
28
Premium/Premium plus in-dash six CD/MP3/satellite compatible sound system (if equipped)
35
Auxiliary input jack (if equipped)
42
USB port (if equipped)
44
GENERAL AUDIO INFORMATION
45
Satellite radio information (if equipped)
48
FAMILY ENTERTAINMENT DVD SYSTEM (IF EQUIPPED)
51
Quick start
51
To play a DVD in the DVD system:
52
To play a CD in the DVD system:
52
To play an MP3 disc in the DVD system:
53
To play an auxiliary source through the DVD system
53
To listen to audio over the headphones (Dual play mode):
54
Using the infrared (IR) wireless headphones:
55
Using wired headphones (not included):
55
To adjust display brightness:
55
DVD player controls
56
Remote control
59
Battery replacement
61
Headphones
62
Wireless headphones
62
Wired headphones
65
Operation
65
Single play/Dual play
65
Operation with an aftermarket audio system (Headphone only mode)
67
Menu mode
67
Angle mode
67
Aspect ratio
68
Language
68
Subtitles
69
Audio CDs
69
Playing MP3 discs
70
MP3 disc quality factors
70
CD, MP3 and CD player care
71
Playing a DVD
72
Slow play
73
Frame by frame
73
Headphone/auxiliary jacks
73
Audio displays
74
Audio interaction
74
Parental control for the DVD system
74
General information
75
Safety information
76
Federal Communication Commission (FCC) Compliance
77
Care and service of the DVD player
78
Environmental extremes
78
Temperature extremes
78
Humidity and moisture condensation
78
Foreign substances
78
Cleaning the liquid crystal display (LCD) flip-down screen
78
Cleaning DVD and CD discs
79
Compatibility with aftermarket audio systems (headphone only mode)
79
NAVIGATION SYSTEM (IF EQUIPPED)
79
SYNC (IF EQUIPPED)
79
Climate Controls
80
HEATER ONLY SYSTEM (IF EQUIPPED)
80
Operating tips
80
MANUAL HEATING AND AIR CONDITIONING SYSTEMS (IF EQUIPPED)
81
Operating tips
83
DUAL AUTOMATIC TEMPERATURE CONTROL (DATC) SYSTEMS (IF EQUIPPED)
84
Operating tips
87
Lights
89
HEADLAMP CONTROL
89
Autolamp control (if equipped)
89
Fog lamp control (if equipped)
89
Daytime running lamps (DRL) (if equipped)
90
High beams
90
Flash to pass
90
PANEL DIMMER CONTROL
91
AIMING THE HEADLAMPS
91
Vertical and horizontal aim adjustment (sealed beam headlamps)
91
Vertical aim adjustment (aerodynamic headlamps)
93
TURN SIGNAL CONTROL
94
MAP LAMPS (IF EQUIPPED)
95
BULB REPLACEMENT
95
Lamp assembly condensation
95
Replacing exterior bulbs
96
Replacing headlamp bulbs (aerodynamic)
97
Replacing park/turn and sidemarker lamp bulbs (aerodynamic)
98
Replacing headlamp bulbs (sealed beam)
99
Replacing park/turn/sidemarker bulbs (sealed beam)
99
Replacing brake/tail/turn/back-up lamp bulbs - Pick-ups only
100
Replacing brake/tail/turn/back-up lamp bulbs - Chassis cabs only (if equipped)
101
Replacing cargo lamp and high-mount brakelamp bulbs
101
Replacing front clearance and identification lamp bulbs
102
Replacing fog lamp bulbs (if equipped)
102
Replacing license plate lamp bulbs
102
Driver Controls
103
MULTI-FUNCTION LEVER
103
Windshield wiper rainlamp feature (if equipped with Autolamp)
104
TILT STEERING WHEEL
104
TRANSMISSION CONTROL
104
ILLUMINATED VISOR MIRROR (IF EQUIPPED)
105
OVERHEAD CONSOLE (IF EQUIPPED)
105
Storage compartment (if equipped)
105
CENTER CONSOLE (IF EQUIPPED)
106
Center console/under-seat storage-Cabela’s Edition (if equipped)
106
AUXILIARY POWER POINT (12VDC)
107
POWER WINDOWS (IF EQUIPPED)
108
One touch down
109
Window lock (if equipped)
109
Power rear slider window (if equipped)
109
Accessory delay
110
INTERIOR MIRROR
110
Automatic dimming interior rear view mirror (if equipped)
110
EXTERIOR MIRRORS
111
Power side view mirrors (if equipped)
111
Heated outside mirrors (if equipped)
112
Fold-away mirrors
112
Powerfold mirrors
112
Telescoping mirrors (if equipped)
114
Memory mirrors (if equipped)
114
Mirror mounted side turn signal indicator (if equipped)
115
Clearance lamps (if equipped)
115
POWER ADJUSTABLE FOOT PEDALS (IF EQUIPPED)
115
SPEED CONTROL (IF EQUIPPED)
116
Setting speed control
116
Resuming a set speed
117
Increasing speed while using speed control
117
Reducing speed while using speed control
118
Turning off speed control
118
STEERING WHEEL CONTROLS (IF EQUIPPED)
118
Audio control features
119
UPFITTER CONTROLS (IF EQUIPPED)
121
MOON ROOF (IF EQUIPPED)
122
HOMELINK WIRELESS CONTROL SYSTEM (IF EQUIPPED)
123
Programming
124
Gate Operator & Canadian Programming
125
Operating the HomeLink Wireless Control System
126
Erasing HomeLink buttons
126
Reprogramming a single HomeLink button
126
STANDARD MESSAGE CENTER (IF EQUIPPED)
127
Selectable features
127
Info menu
127
Odometer/Trip odometer
127
Engine hour meter (if equipped)
127
Distance to empty (DTE)
128
Average fuel economy (AFE)
128
Setup menu
129
Oil Life XXX% HOLD RESET = NEW
129
Units (English/Metric)
130
Language
130
System check
130
Oil Life XXX% HOLD RESET = NEW
131
System warnings
131
OPTIONAL MESSAGE CENTER (IF EQUIPPED)
137
Selectable features
137
Reset
137
Info menu
138
Odometer/Trip odometer
138
Engine hour meter (if equipped)
138
Distance to empty (DTE)
138
Average fuel economy (AFE)
139
Drive timer (Elapsed travel timer)
139
Setup menu
140
System check
140
Oil Life XXX% HOLD RESET = NEW
141
Units (English/Metric)
142
Autolamp
142
Autolock
142
Compass display (if equipped)
142
Compass zone/calibration adjustment
143
Language
144
System warnings
144
TAILGATE LOCK (IF EQUIPPED)
150
Tailgate removal
150
Tailgate step (if equipped)
151
Bed extender (if equipped)
152
Locks and Security
155
KEYS
155
POWER DOOR LOCKS (IF EQUIPPED)
155
Smart locks (if equipped)
155
Autolock feature (if equipped)
156
Deactivating/activating autolock feature
156
Power door lock switch autolock enable/disable procedure
156
Keyless entry keypad autolock enable/disable procedure
157
Autounlock feature (if equipped)
157
Deactivating/activating autounlock feature
158
Power door lock switch autounlock enable/disable procedure
158
Keyless entry keypad autounlock enable/disable procedure
158
CHILDPROOF DOOR LOCKS (IF EQUIPPED)
159
REMOTE ENTRY SYSTEM (IF EQUIPPED)
159
Two step door unlocking
160
One step door unlocking
160
Switching from two step to one step door unlocking
161
Locking the doors
161
Car finder
161
Sounding a panic alarm
161
Memory seats/adjustable pedals/mirrors (if equipped)
161
Activating the memory feature
162
Deactivating the memory feature
162
Replacing the battery
162
Replacing lost remote entry transmitters
163
How to program your remote entry transmitters
163
Perimeter lamps illuminated entry
164
Deactivating/activating perimeter lamps illuminated entry
165
Illuminated entry
165
SECURICODE™ KEYLESS ENTRY SYSTEM
166
Programming a personal entry code and keypad association to memory seats, mirrors and pedals
166
Erasing personal code
167
Anti-scan feature
167
Unlocking and locking the doors using keyless entry
167
SECURILOCK™ PASSIVE ANTI-THEFT SYSTEM (IF EQUIPPED)
168
Anti-theft indicator
168
Automatic arming
169
Automatic disarming
169
Replacement keys
169
Programming spare keys
169
PERIMETER ALARM SYSTEM (IF EQUIPPED)
171
Arming the system
171
Disarming the system
171
Triggering the anti-theft system
171
Seating and Safety Restraints
172
SEATING
172
Non-adjustable head restraints
172
Full bench seat (if equipped)
173
40/20/40 split bench seat (if equipped)
173
40/20/40 front seat armrest and console (if equipped)
174
Captain’s chair (if equipped)
175
Adjusting the front power seat (if equipped)
175
Using the manual lumbar support
176
Heated seats (if equipped)
177
Memory seats/power mirrors/adjustable pedals (if equipped)
177
REAR SEATS
178
Adjustable head restraints (if equipped)
178
Cabela’s seat
179
Rear folding seat system with load floor (if equipped)
179
SAFETY RESTRAINTS
181
Safety restraints precautions
181
Combination lap and shoulder belts
182
Vehicle sensitive mode
183
Belt sensitive mode
183
Automatic locking mode
183
When to use the automatic locking mode
183
How to use the automatic locking mode
184
How to disengage the automatic locking mode
184
Energy management feature
185
Safety belt pretensioner (if equipped)
185
Front safety belt height adjustment
185
Safety belt with cinch tongue (Regular cab center seating position and Super Cab/Crew Cab rear center seating positions)
186
How to fasten the cinch tongue (Regular cab center seating position and Super Cab/Crew Cab rear center seating positions)
187
Lap belts
187
Adjusting the lap belt
187
Safety belt warning light and indicator chime
188
Conditions of operation
189
Belt-Minder
189
One-time disable
191
Deactivating/activating the Belt-Minder feature (Driver only)
191
Safety belt extension assembly
192
AIRBAG SUPPLEMENTAL RESTRAINT SYSTEM (SRS)
193
Important SRS precautions
193
Children and airbags
195
How does the airbag supplemental restraint system work?
195
Determining if the system is operational
197
S.O.S. Post Crash Alert
197
Disposal of airbags and airbag equipped vehicles
197
Passenger airbag ON/OFF switch (if equipped)
198
Turning the passenger airbag off
198
Turning the passenger airbag back on
199
NHTSA deactivation criteria (excluding Canada)
200
Transport Canada deactivation criteria (Canada Only)
201
SAFETY RESTRAINTS FOR CHILDREN
202
Important child restraint precautions
202
Recommendations for attaching child safety restraints for children
204
Transporting children
206
SAFETY SEATS FOR CHILDREN
206
Infant and/or toddler seats
206
Installing child safety seats with automatic locking mode combination lap and shoulder belts (all front and rear outboard passenger seat positions)
207
Installing child safety seats in cinch tongue combination lap and shoulder belt seating positions (Regular Cab front center and Super/Crew cab rear center positions)
211
Installing child safety seats in the front row lap belt seating positions (Super Cab and Crew Cab)
214
Attaching child safety seats with LATCH (Lower Anchors and Tethers for CHildren) attachments
215
Attaching child safety seats with tether straps
215
Tether strap attachment (rear SuperCab only)
219
Child booster seats
220
When children should use booster seats
221
Types of booster seats
222
The importance of shoulder belts
223
Child restraint and safety belt maintenance
224
Tires, Wheels and Loading
225
NOTICE TO UTILITY VEHICLE AND TRUCK OWNERS
225
VEHICLE CHARACTERISTICS
225
4WD and AWD Systems (if equipped)
225
How your vehicle differs from other vehicles
226
INFORMATION ABOUT UNIFORM TIRE QUALITY GRADING
227
Treadwear
228
Traction AA A B C
228
Temperature A B C
228
TIRES
229
Glossary of tire terminology
229
INFLATING YOUR TIRES
230
Tire inflation information
232
TIRE CARE
233
Inspecting your tires
233
Tire wear
234
Damage
234
U.S. DOT Tire Identification Number (TIN)
235
Tire Replacement Requirements
235
Safety practices
236
Highway hazards
237
Tire and wheel alignment
237
Tire rotation
238
INFORMATION CONTAINED ON THE TIRE SIDEWALL
240
Information on “P” type tires
240
Additional information contained on the tire sidewall for “LT” type tires
243
Information on “T” type tires
244
Location of the tire label
244
TIRE PRESSURE MONITORING SYSTEM (TPMS) (IF EQUIPPED)
245
Understanding your Tire Pressure Monitoring System (TPMS)
247
When your temporary spare tire is installed
247
When you believe your system is not operating properly
248
When inflating your tires
249
How temperature affects your tire pressure
249
TPMS reset procedure (if applicable)
250
Overview
250
TPMS reset procedure
252
SNOW TIRES AND CHAINS
255
VEHICLE LOADING – WITH AND WITHOUT A TRAILER
256
Special loading instructions for owners of pickup trucks and utility-type vehicles
262
TRAILER TOWING
262
Preparing to tow
265
Hitches
265
Hitch rating
266
Weight distributing hitch
266
Safety chains
267
Trailer brakes
267
Integrated trailer brake controller (if equipped)
267
Trailer lamps
271
Driving while you tow
271
Servicing after towing
272
Trailer towing safety tips
272
General
272
Loading
272
Braking
273
Backing up
273
Tires
273
Launching or retrieving a boat
273
RECREATIONAL TOWING
274
Driving
275
STARTING
275
Positions of the ignition
275
Preparing to start your vehicle
275
Important safety precautions
276
Starting the engine
277
Guarding against exhaust fumes
278
Important ventilating information
278
ENGINE BLOCK HEATER
278
BRAKES
280
Four-wheel anti-lock brake system (ABS) (if equipped)
280
ABS warning lamp
281
Using ABS
281
Parking brake
281
TRACTION CONTROL™ (IF EQUIPPED)
282
STEERING
283
LIMITED-SLIP AXLE (IF EQUIPPED)
284
PREPARING TO DRIVE
284
AUTOMATIC TRANSMISSION OPERATION (IF EQUIPPED)
285
Brake-shift interlock
285
Understanding the shift positions of the 5–speed automatic transmission
287
If your vehicle gets stuck in mud or snow
289
MANUAL TRANSMISSION OPERATION (IF EQUIPPED)
289
Using the clutch
290
Recommended shift speeds
290
Reverse
291
Parking your vehicle
292
REVERSE SENSING SYSTEM (IF EQUIPPED)
292
REARVIEW CAMERA SYSTEM (IF EQUIPPED)
294
FOUR-WHEEL DRIVE (4WD) OPERATION (IF EQUIPPED)
296
Manual Shift On Stop (MSOS) 4x4 system (if equipped)
297
Electronic Shift On the Fly (ESOF) 4x4 system (if equipped)
297
4WD system indicator lights
298
Using a Manual Shift On Stop (MSOS) 4x4 system (if equipped)
299
Shifting from 2H (2WD) to 4H (4x4 High)
299
Shifting from 4H (4x4 High) to 2H (2WD)
300
Shifting from 4H (4x4 High) to 4L (4x4 Low)
300
Shifting from 4L (4x4 Low) to 4H (4x4 High) or 2H (2WD)
300
Using the N (Neutral) position
301
Using the Electronic Shift On the Fly (ESOF) 4x4 system (if equipped)
301
Positions of the electronic shift system
301
Shifting from 2WD to 4x4 HIGH
302
Shifting from 4x4 HIGH to 2WD
302
Shifting from 4x4 HIGH to 4x4 LOW
302
Shifting from 4x4 LOW to 4x4 HIGH or 2WD
303
Driving off-road with truck and utility vehicles
303
How your vehicle differs from other vehicles
304
Basic operating principles
304
If your vehicle goes off the edge of the pavement
304
If your vehicle gets stuck
305
Emergency maneuvers
305
Parking
306
4WD Systems
306
Normal characteristics
307
Sand
307
Mud and water
307
Driving on hilly or sloping terrain
308
Driving on snow and ice
309
Maintenance and Modifications
310
VEHICLE USED AS A STATIONARY POWER SOURCE
311
DRIVING THROUGH WATER
311
SNOWPLOWING
312
Installing the snowplow
312
Operating the vehicle with the snowplow attached
313
Snowplowing with your airbag-equipped vehicle
313
Transmission operation while plowing
314
Roadside Emergencies
315
ROADSIDE ASSISTANCE
315
Getting roadside assistance
315
Using roadside assistance
316
HAZARD FLASHER CONTROL
316
FUEL PUMP SHUT-OFF SWITCH
317
FUSES AND RELAYS
318
Fuses
318
Standard fuse amperage rating and color
318
Passenger compartment fuse panel
319
Power distribution box
322
CHANGING A FLAT TIRE
327
Dissimilar spare tire/wheel information
327
T-Type/Mini-Spare Tire Information (Harley Davidson only)
329
Stopping and securing the vehicle
330
Location of the spare tire and tools
331
Removing the spare tire (with spare tire carrier only)
331
Tire change procedure
332
Installing dual rear wheel ornaments
340
Stowing the flat/spare tire
341
WHEEL LUG NUT TORQUE SPECIFICATIONS
342
JUMP STARTING
343
Preparing your vehicle
343
Connecting the jumper cables
344
Jump starting
346
Removing the jumper cables
346
WRECKER TOWING
348
Emergency towing
349
Customer Assistance
350
GETTING THE SERVICES YOU NEED
350
Away from home
350
Additional assistance
351
IN CALIFORNIA (U.S. ONLY)
352
THE BETTER BUSINESS BUREAU (BBB) AUTO LINE PROGRAM (U.S. ONLY)
352
UTILIZING THE MEDIATION/ARBITRATION PROGRAM (CANADA ONLY)
353
FORD EXTENDED SERVICE PLAN
354
GETTING ASSISTANCE OUTSIDE THE U.S. AND CANADA
354
ORDERING ADDITIONAL OWNER’S LITERATURE
355
Obtaining a French owner’s guide
356
REPORTING SAFETY DEFECTS (U.S. ONLY)
356
REPORTING SAFETY DEFECTS (CANADA ONLY)
356
Cleaning
357
WASHING THE EXTERIOR
357
WAXING
358
PAINT CHIPS
358
ALUMINUM WHEELS AND WHEEL COVERS
358
ENGINE
359
PLASTIC (NON-PAINTED) EXTERIOR PARTS
360
WINDOWS AND WIPER BLADES
360
INSTRUMENT PANEL/INTERIOR TRIM AND CLUSTER LENS (EXCEPT HARLEY-DAVIDSON)
361
INSTRUMENT PANEL AND CONSOLE (HARLEY-DAVIDSON ONLY)
362
INTERIOR
363
LEATHER SEATS (IF EQUIPPED, EXCEPT FOR THE KING RANCH F–250 AND F–350 CREW CAB)
363
LEATHER SEATS FOR THE KING RANCH F-250 AND F-350 CREW CAB ONLY (IF EQUIPPED)
364
UNDERBODY
365
FORD, LINCOLN AND MERCURY CAR CARE PRODUCTS
365
Maintenance and Specifications
367
SERVICE RECOMMENDATIONS
367
PRECAUTIONS WHEN SERVICING YOUR VEHICLE
367
Working with the engine off
367
Working with the engine on
367
OPENING THE HOOD
368
IDENTIFYING COMPONENTS IN THE ENGINE COMPARTMENT
369
5.4L V8 gasoline engines
369
6.8L V10 gasoline engine
370
WINDSHIELD WASHER FLUID
371
CHANGING THE WIPER BLADES
372
ENGINE OIL
372
Checking the engine oil
372
Adding engine oil
373
Engine oil and filter recommendations
374
Use SAE 5W-20 engine oil
374
BATTERY
375
ENGINE COOLANT
377
Checking engine coolant
377
Adding engine coolant
378
Recycled engine coolant
381
Coolant refill capacity
381
Severe climates
381
What you should know about fail-safe cooling (if equipped)
382
How fail-safe cooling works
382
When fail-safe mode is activated
383
FUEL FILTER
383
WHAT YOU SHOULD KNOW ABOUT AUTOMOTIVE FUELS
383
Important safety precautions
383
Refueling
385
Fuel filler cap
386
Choosing the right fuel
387
Octane recommendations
387
Fuel quality
387
Cleaner air
388
Running out of fuel
388
ESSENTIALS OF GOOD FUEL ECONOMY
388
Measuring techniques
388
Filling the tank
388
Calculating fuel economy
389
Driving style — good driving and fuel economy habits
390
Habits
390
Maintenance
391
Conditions
391
EPA fuel economy estimates
391
EMISSION CONTROL SYSTEM
392
On board diagnostics (OBD-II)
393
Readiness for Inspection/Maintenance (I/M) testing
394
POWER STEERING FLUID
395
BRAKE FLUID
396
CLUTCH FLUID (IF EQUIPPED)
397
TRANSMISSION FLUID
397
Checking automatic transmission fluid (if equipped)
397
Low fluid level
398
Correct fluid level
398
High fluid level
399
Adjusting automatic transmission fluid levels
399
Checking and adding manual transmission fluid (if equipped)
400
TRANSFER CASE FLUID (IF EQUIPPED)
401
AIR FILTER
402
Changing the air filter element
402
MOTORCRAFT PART NUMBERS
404
MAINTENANCE PRODUCT SPECIFICATIONS AND CAPACITIES
405
ENGINE DATA
409
Drivebelt routing
409
IDENTIFYING YOUR VEHICLE
410
Safety Compliance Certification Label
410
Vehicle identification number (VIN)
410
TRANSMISSION CODE DESIGNATIONS
411
Accessories
412
GENUINE FORD ACCESSORIES FOR YOUR VEHICLE
412
Exterior style
412
Interior style
412
Lifestyle
413
Peace of mind
413
Index
414

2009 Ford F250 Overview

Introduction

The 2009 Ford F250 is a stalwart in the heavy-duty truck segment, offering an impressive blend of rugged capability, powerful performance, and modern amenities. As part of the Ford Super Duty lineup, this truck is designed to tackle the toughest jobs while providing comfort for everyday use. With a robust chassis and a lineup of powerful engine options, the F250 is a trusted choice for both work and leisure, appealing to a diverse range of truck enthusiasts.

Powertrains

The 2009 F250 features two formidable engine options tailored for performance and efficiency. The standard 5.4-liter V8 engine generates 300 horsepower and 360 lb-ft of torque, ensuring sufficient power for daily driving and light towing. For those seeking increased capability, the available 6.4-liter turbocharged V8 diesel engine delivers a hefty 350 horsepower and an astonishing 650 lb-ft of torque, perfect for heavy towing and hauling duties. Both engines are paired with a smooth-shifting five-speed automatic transmission, providing reliability and ease of handling.

Trims

This model comes in several trims to suit varying customer needs: the XL, XLT, and Lariat. The XL serves as a functional work truck with essential features, while the XLT adds a touch of comfort with upgraded interior materials and sound systems. The Lariat trim offers a more luxurious experience, including leather seating, advanced technology options, and an enhanced audio system, making it ideal for those who desire a blend of ruggedness and refinement.

Features

In terms of features, the 2009 F250 is equipped with a range of options to enhance both convenience and safety. Standard features include air conditioning, power windows and locks, and an optional navigation system. For increased safety, the F250 comes with advanced airbag systems and an anti-lock braking system, providing drivers with more confidence on the road.

Owner's Manual

The owner's manual for the 2009 Ford F250 serves as a comprehensive resource for drivers, detailing essential maintenance schedules, troubleshooting tips, and in-depth information about the truck's features and capabilities. It is an invaluable tool for maximizing the use and longevity of the vehicle, ensuring that owners can keep their F250 in optimal condition for years to come.

User manual download

The Ford F250 owner manual for the 2009 model year is to be found in PDF downloadable format on this page. The owner manual for the model year 2009 is free and in English, but the repair manuals are usually not easy to get and may cost more.

Posted by, John Mana author bio image
A passionate guy about car models, makes, and manuals.

Manual Questions

Do you have questions about the 2009 Ford F250 owners manual?
Fill the form below and someone will help you!